Online courses can be a fantastic way to boost your income and help more people than you could via one-to-one support. Learn how to sell courses on Shopify in this detailed step-by-step guide complete with free video tutorials.
How to Sell Courses on Shopify – Step-by-Step Guide
This tutorial shows you everything you need to do to sell courses on Shopify, from creating an account and setting up your online course website to uploading your course content, getting paid, and more.
You’ll find it much easier to complete this process if you prepare the following items in advance:
– Your course content
– Product descriptions and images for each of your courses.
If you prefer to watch along, I’ve also included a free ten-part video series above that explains each of the following steps in more detail.
Total Time: 2 hours
1. Create a Shopify Account
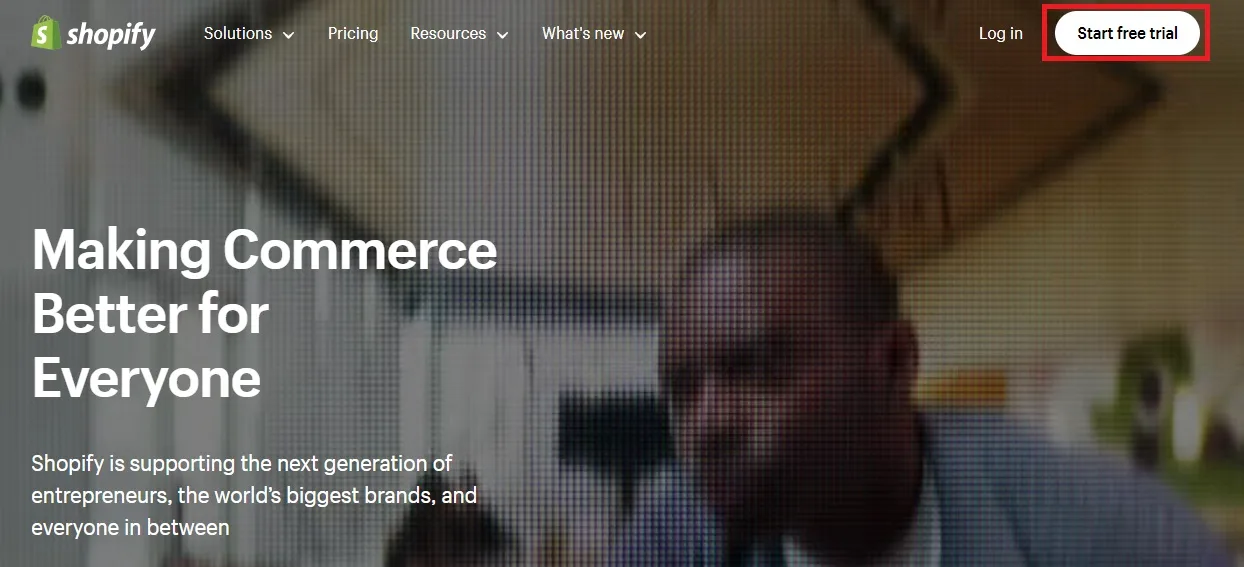
Head to Shopify.com, click Start Your Free Trial, and enter a username and password. Alternatively, you can sign up via a Google, Apple, or Facebook account.
2. Complete the Sign-Up Process
Next, Shopify asks you where you’d like to sell your products.
Since we’re dealing with courses here, In Person and Online Marketplaces aren’t as relevant as an online store, a link from an existing website, and social media, so those are the options we’ll go with.
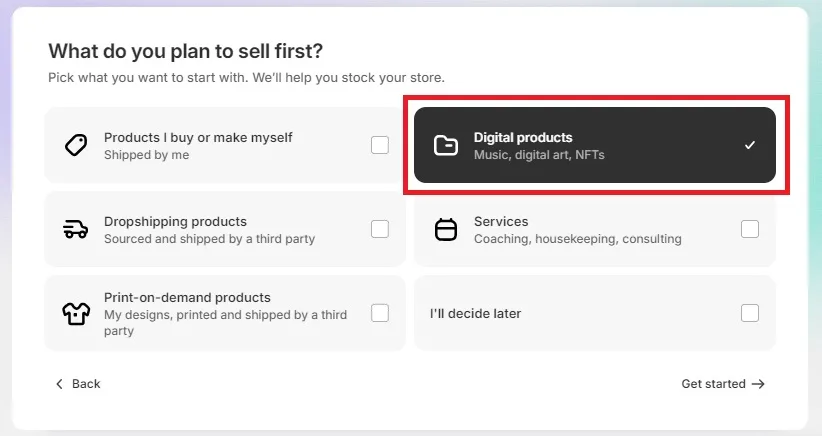
You’re then asked about the type of products you plan to sell. Here, select Digital Products then Get Started.
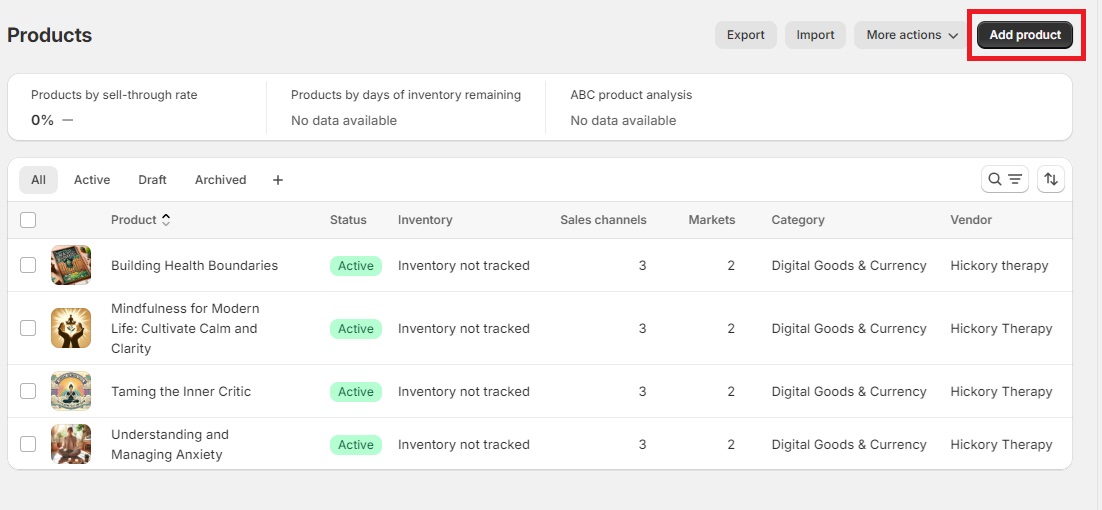
3. Add a New Product
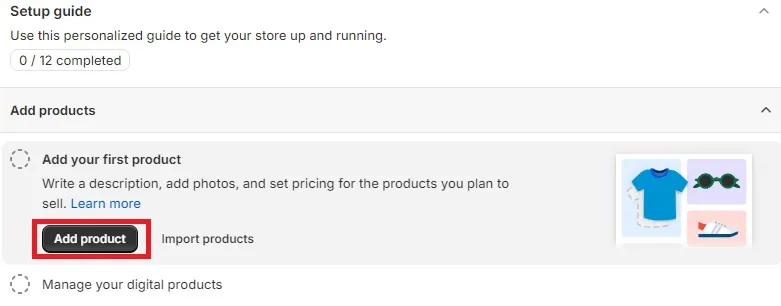
To sell your courses, you need to create a product listing for them. To do that, click Add Product on the setup screen.
4. Enter Your Product Details
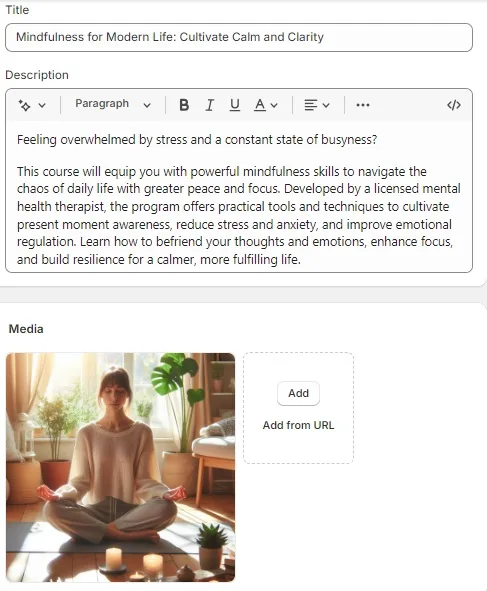
Enter a title and a compelling product description for your course. Then, upload a picture to use as a main product image.
You can also add extra images. You may even want to include video content such as a course introduction to help users decide if your course is right for them.
5. Add Your Course Pricing
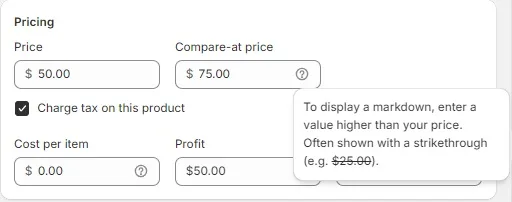
Enter your pricing.
You can also use this section to show a marked-down price. For example, if you value your courses at $75 but want to offer discounted prices to attract your first customers to your new online course site, you could set the Compare at Price at $75 and the actual price as $50.
This shows customers that they’re getting the course at $25 less than the usual price, which can help entice them into making a purchase.
6. Select ‘Digital Product’
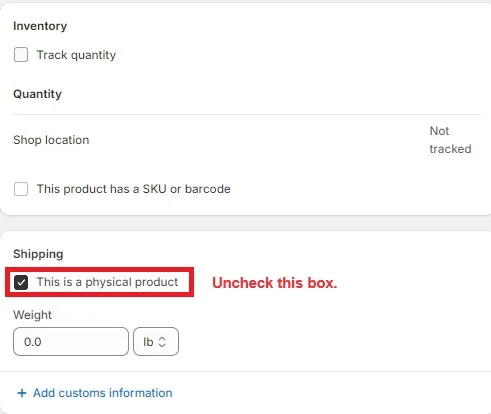
In the next two sections, you’ll see that Track Inventory and This is a Physical Product are both checked by default.
Uncheck them.
Since this is a digital product, you’ll never run out of stock so there’s no need to track inventory unless you’re selling courses on Shopify to a limited number of customers.
Likewise, you don’t have any physical products to ship, so uncheck that box too.
7. Optimize Your Product Listing for Search Engines
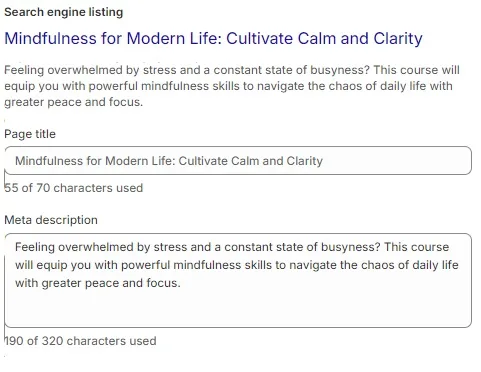
Use the Search Engine Listing to set an optimized page title and meta description to determine how your course will appear in search results.
8. Add Remaining Product Details
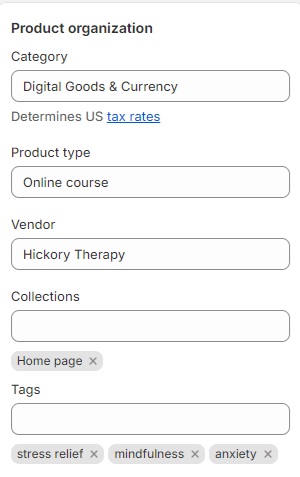
Finally, head to the Product Organization tab to set the following details:
A. Category
Frustratingly, Shopify doesn’t offer a specific category for online courses. I’ve used Digital Goods and Currency for this tutorial.
B. Product Type
You can use the Product Type field to create a custom category, in this case, Online Course.
C. Vendor
The vendor field is mainly designed to help physical product sellers organize and replenish their inventory. Since you’re creating your own courses, this isn’t an essential field, but you may want to add the name of your business here.
When you’re all done, remember to hit save.
9. Create Product Listings for The Rest of Your Courses
To save time, I recommend creating product listings in advance for each course you plan to sell.
That way, you don’t have to return to the Products menu and create a new one each time you set up a new course.
10. Open the Shopify App Store
By default, Shopify doesn’t have out-of-the-box features for creating courses. The good news is that you can use one of the many course creation apps in the Shopify app store to create, host, and manage your content.
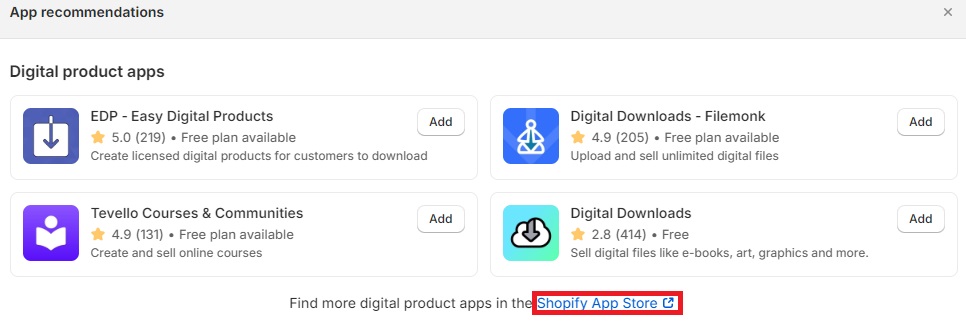
To do this click Add Apps at the bottom of the main menu.
At the bottom of the App Recommendations screen, click the Shopify App Store link.
11. Install the LDT Online Course App

There are several excellent online course apps for Shopify. The one I’m using for this tutorial is called LDT Online Courses.
This is one of the only free course tools built for Shopify and, in my experience, functions just as well as any of the paid options.
Use the search bar to find this app (search for LDT Online Courses), then click it to open the app page and tap Install.
12. Create Your First Course
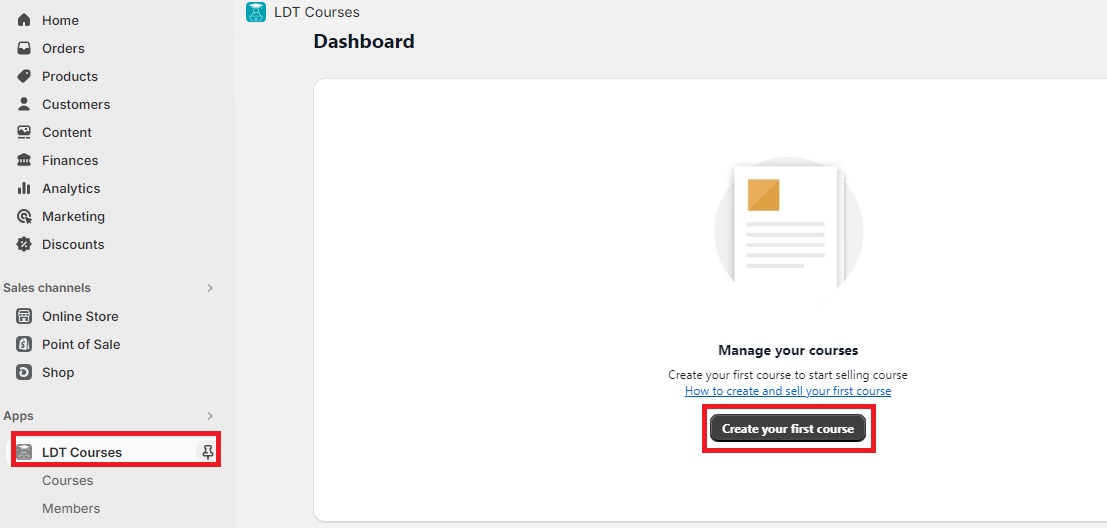
Once installed, LTD will open automatically in your Shopify admin dashboard. You can return to it at any time by clicking LDT Courses in the Apps section of your menu.
For now, just click Create your first course to get started.
13. Add a Course Title and Description
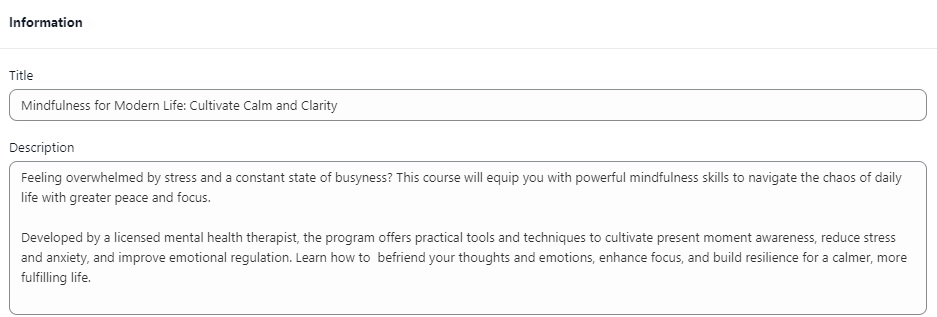
Begin by giving your course a name. Then, enter a description which tells people why they should be interested in buying your course and what they’ll learn from it.
As I said at the start of this guide, this process is much quicker if you already have all your course information ready to go.
14. Set Course Access and Viability
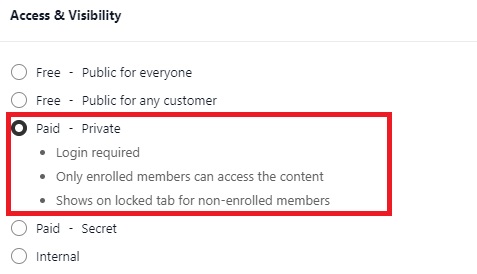
You now have five options that determine who can access your course.
A. Free – Public for Anyone
Free and publicly available to serve as a lead magnet or simply to demonstrate your expertise as a therapist.
B. Free – Public for Any Customer
This makes your course free for existing customers, which is a great way of providing bonus content that can sweeten the deal when selling your paid courses.
For example, you could sell a course on general mindfulness with the promise that those who sign up get access to a free mini-course on self-guided meditation.
C. Paid – Private
This is the option we’ll be using throughout the rest of this tutorial. It allows you to restrict access to the course content to those who’ve paid for it, while still displaying it as a product option to entice potential customers to buy it.
D. Paid – Secret
This can be used to upsell exclusive bonus courses to your existing members.
E. Internal
Only enrolled members can access the content.
Pick the one that’s right for you (in this case, Paid – Private) and move on.
15. Sync Your Course to a Product Listing
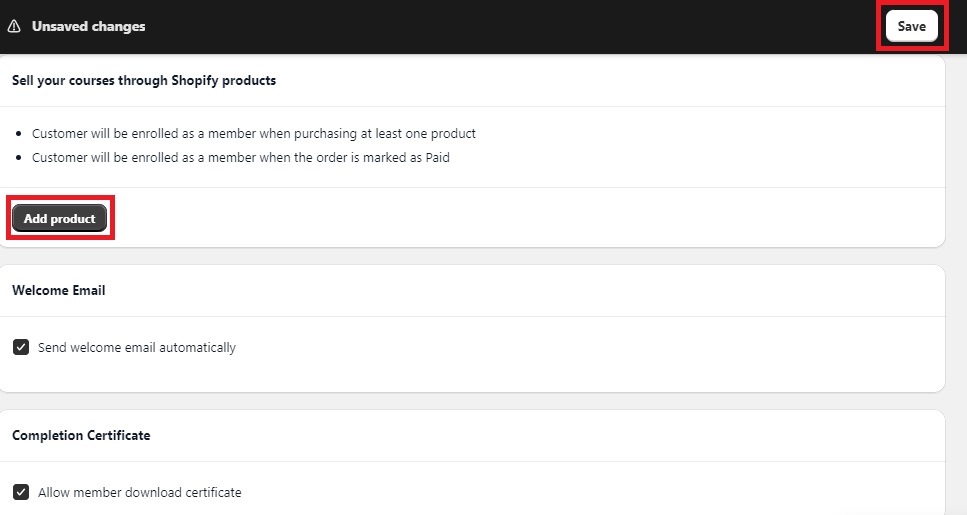
At this point, remember to hit the Save button so that you don’t lose your progress.
Then, click the Add Product button.
Select your course from the list of products and tap Add.
You can leave the Welcome Email and Course Certification boxes checked (presuming you plan to include both) and then click Save again.
16. Add Your Course Modules
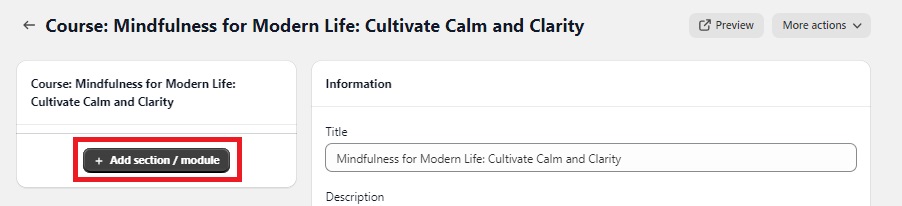
Clicking Save adds a new tab to the course creation page.
This allows you to add your course content by tapping Add Section/module.
You can now add a title for your first module and an outline of what’s included.
After that, you can determine how this module is published.
In this example, I’m publishing the first introductory module, so it makes sense to publish this immediately.
However, for subsequent modules, I might choose to publish it on a set schedule or drip-feed each module so that customers get access to new course sections every day or every week.
17. Add Your First Lesson to Your Module
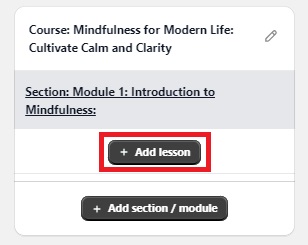
You can now click the Add Lesson tab to incorporate your course content for each module.
18. Add Content to Your Lesson
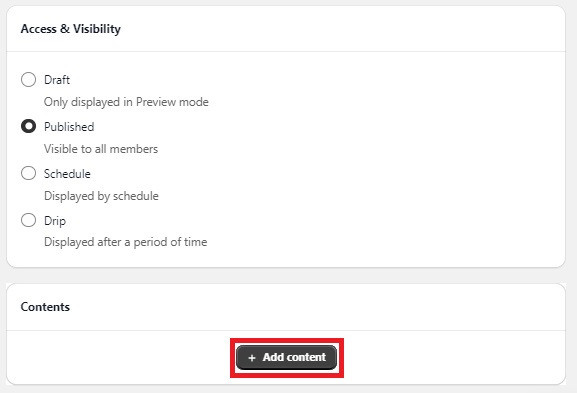
Begin by adding a title and description for each lesson that informs students what they’ll learn. Set the visibility and accessibility, then click Add Content.
Here, you have a whole bunch of options.
For example, you could:
A. Add a video that delivers your main lesson content
You can either upload a video directly or link to existing content that you host on a third-party platform like YouTube.
B. Add a written outline of your course content using a Text Block
Provide students with take-away handouts in the form of an uploaded PDF or an editable document they can use as a worksheet.
C. Create an end-of-lesson quiz to test students on what they’ve learned Depending on the type of course you’re creating, you can also require them to hit a minimum passing score before the lesson is completed.
D. Provide an opportunity for students to talk with you
Finally, if you want to offer students some one-on-one with you or a chance to attend a group session, you can even add a Zoom meeting ID.
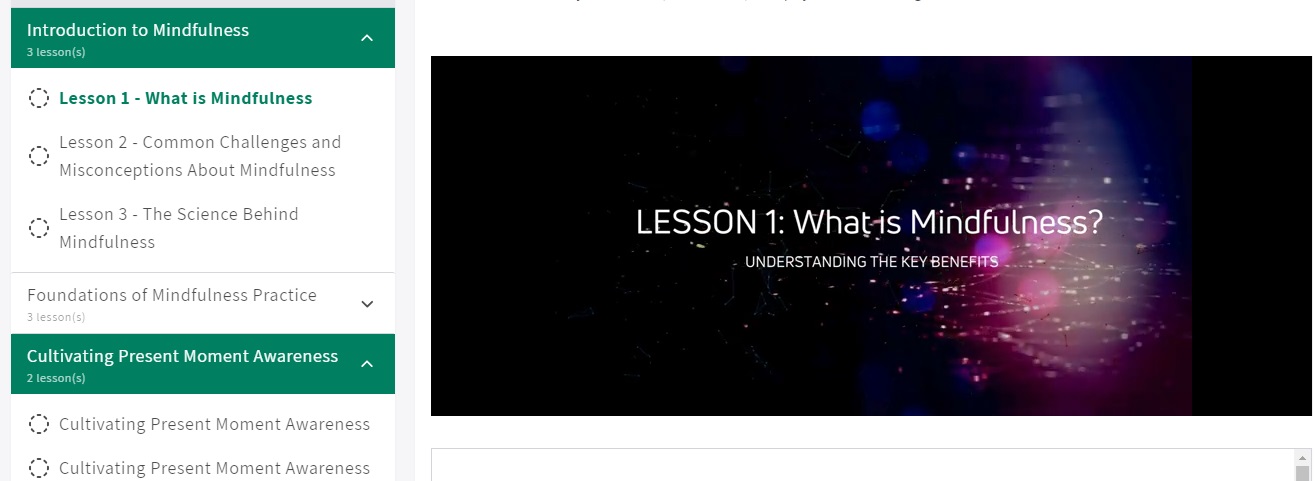
19. Create More Modules and Lessons
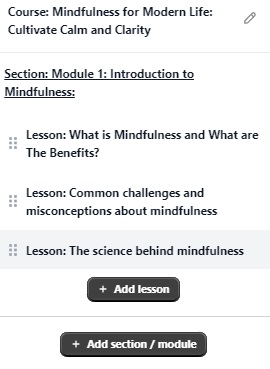
When you’re done with your first lesson, remember to hit Save then add as many additional lessons as your module requires.
Each of your lessons will appear in the main course menu. This makes them easy to access if you want to edit them. It also provides you with a handy overview of your course structure.
Once you’ve added all the lessons in one module, create another module, add your lessons to it, and repeat until you’ve created your entire course.
20. Add More Courses
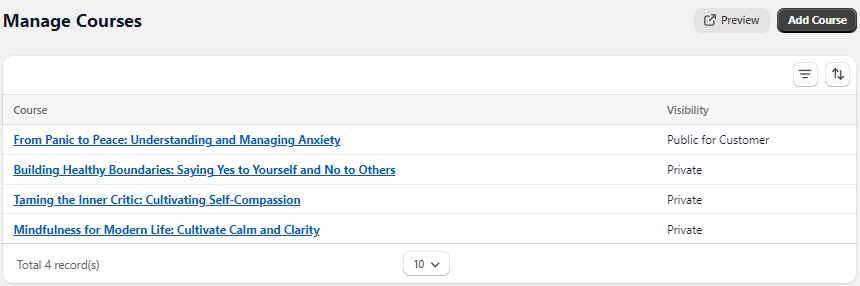
Before we go about putting your customer-facing course website together, repeat steps 13 – 19 to add any additional courses you want to sell.
21. Customize the My Courses Page
When you’re ready, head back to the LDT Courses menu and click Setup under Customize the My Courses page.
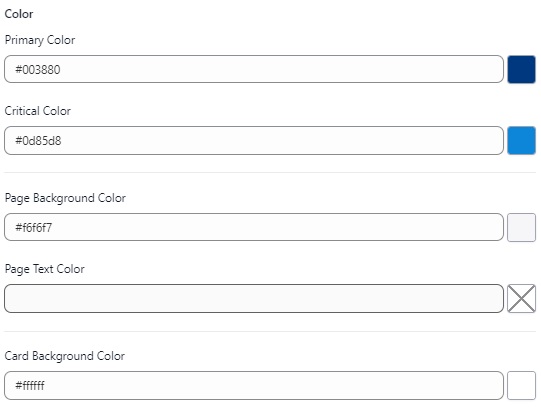
Here, you can set a custom URL for your student’s course portal (eg. yourwebsite.com/courses) and change the color of your courses page.
22. Customize the Certificate of Completion
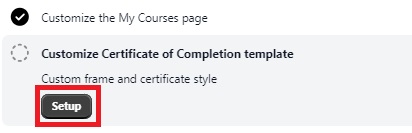
Certificates are always a nice touch to add to the end of your course, so let’s customize the free template which comes included with LDT Courses.
First, click the Setup button under the Customize Certificate of Completion template.
From here, you can upload a custom certificate frame (perhaps one you made on Canva), and then use the HTML template to customize the certificate’s wording.
Don’t be put off by the use of code here. All you need to do is look at text like the CERTIFICATE OF COMPLETION header and decide if you want to change it.
Of course, if you’re familiar with HTML, feel free to make more alterations.
23. Modify the Thank You Page
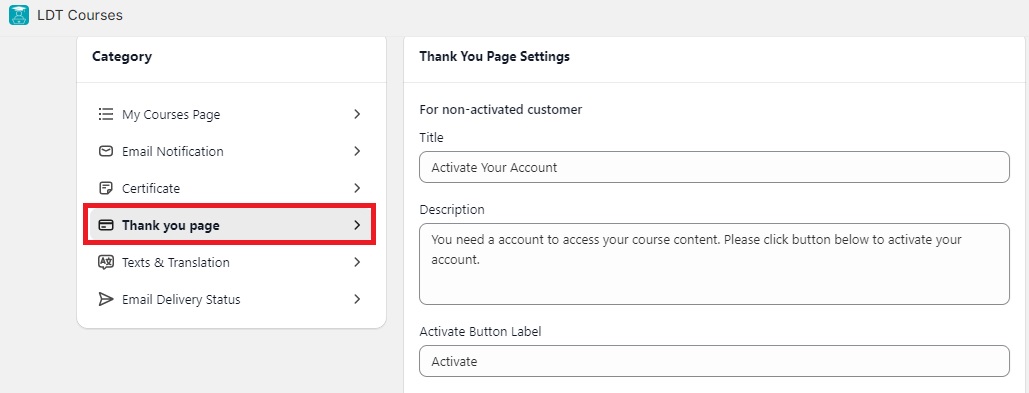
While still on the certificate section, click Thank you page in the left-hand menu. This will allow you to customize the content users first see once they buy their course.
You can change the message to both non-activated and activated customers, along with the text on the relevant CTA button.
24. Customize Your Email Notification
Save any Thank You page edits you made and either click on Email Notification from the left-hand menu or set it up under the relevant section on the LDT Courses dashboard.
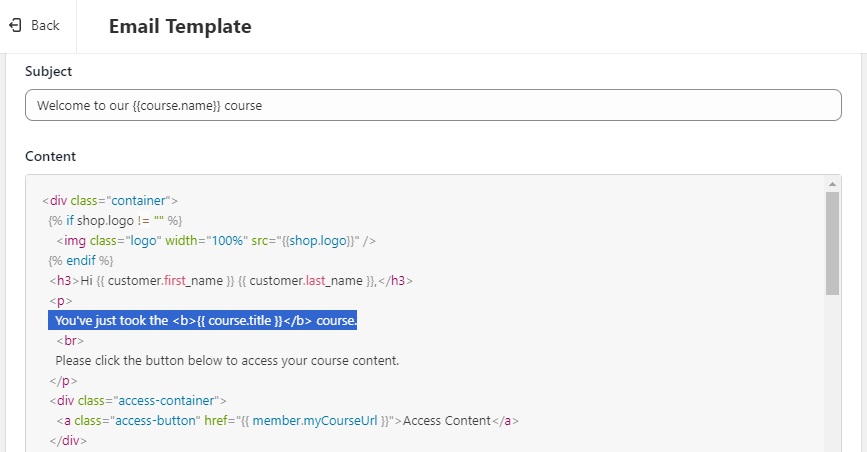
This allows you to customize the email sent to students when they first pay for a course. Enter the name of your business or store and an email address from which your store will automatically send emails.
Again, this template is in HTML format. Fortunately, you don’t have to change very much, though I would change you just took the [course name] course. to you just purchased [course name].
25. Add Translations
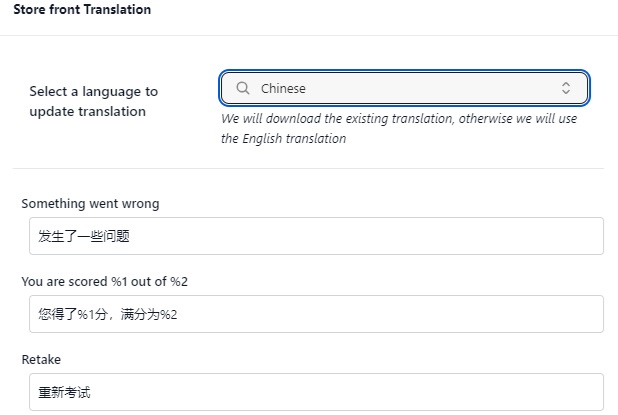
The final part of the course setup process allows you to change the storefront language if your audience speaks a language other than English.
This won’t translate the content of your course, but it will change the messages automatically generated as students work their way through your course.
With all that done, you’re finally finished setting up your courses. Now, it’s time to create a storefront to sell those courses.
26. Access the Shopify Theme Library
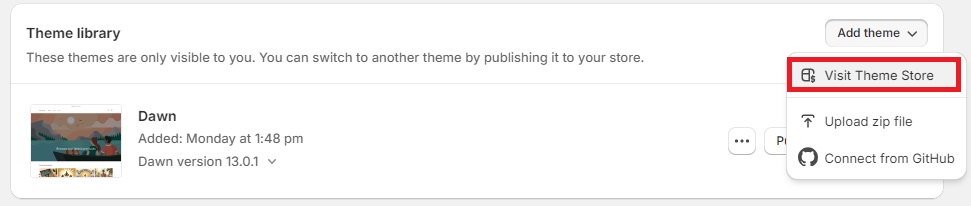
First, go to Online Store – Themes, tap the Add Theme drop-down and click Visit Theme Store.
On the next screen, click Explore Themes to open up a library of free and paid-for Shopify themes.
27. Choose a Shopify Theme

Once you’re in the library, you can use the filter options to narrow down your choices between free or paid themes. You can also look for themes for specific industries.
When you’ve found a Shopify theme you like, click on it, then tap Install.
28. Publish Your Shopify Theme
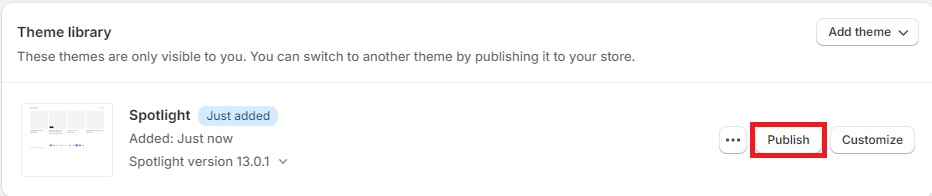
Next, go back to the main Themes page. You’ll see your new theme under Theme Library.
Click Publish, then Publish again on the pop-up screen.
Now, when you preview your store, you’ll see the new theme applied.
29. Access the theme editor to customize your site

Once your theme is published, you’ll see a Customize button next to your active screen. Click it to access the theme editor.
30. Customize Your Store
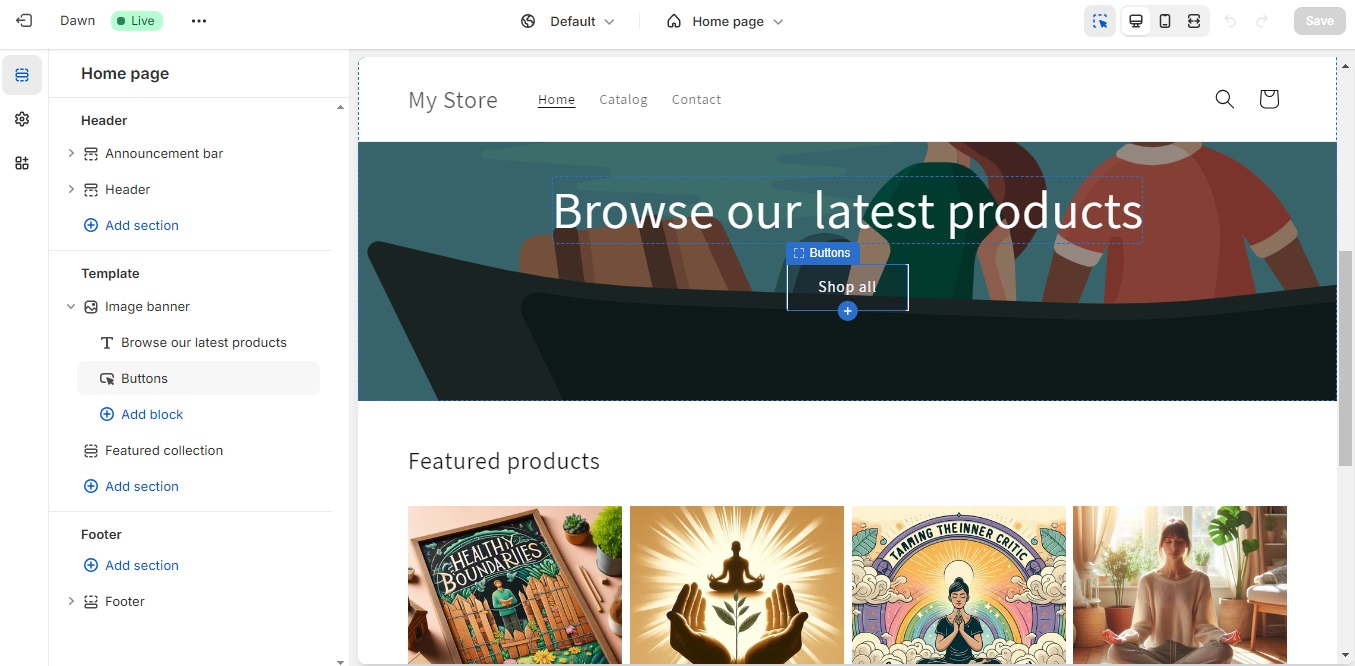
You can now use the theme editor to customize the design and content of all elements on your page.
For example, when you click on a text element, you’ll have new options to change the text itself, its font, size, and other details.
You can also add new sections, remove them altogether, or rearrange sections on the page.
There’s a lot to configure here, so I’ll leave it to you to play around and edit your site however you like.
Alternatively, you can see Part 6 in my How to Sell Courses on Shopify video series.
When you’re done customizing, click Save.
31. Configure Store Details Settings

To finish setting up your online course website, you’ll need to configure your settings. You can find the settings icon at the bottom of the main navigation menu.
Once you’ve accessed the settings, go to Store Details and tap the pencil icon to configure:
– Store name
– Store phone number
– Store email address.
You can also use this page to set:
– Billing address
– Store currency
– Your time zone
– Order ID format.
32. Access Payment Settings
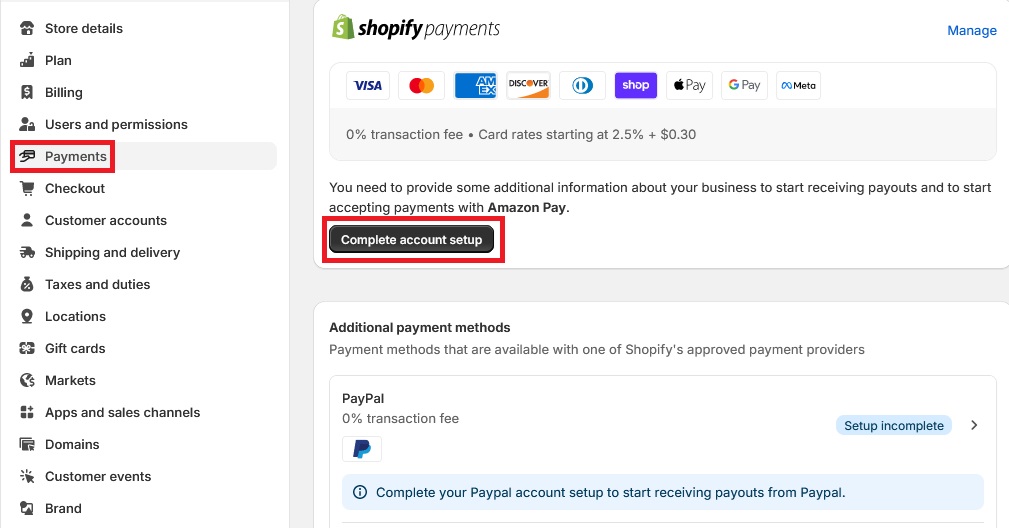
Before you can start accepting payments for your online courses, you need to verify your business information to prove you’re legitimate.
To begin this process, go to Payments and click Complete Account setup.
33. Submit Your Business Details
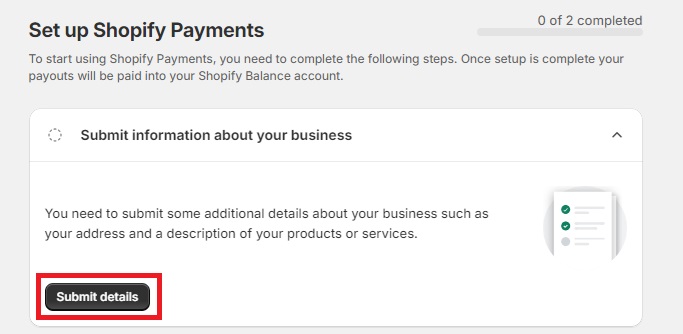
On the next screen, click Submit details.
You’ll then need to fill in a form with the following details:
– Business type (sole proprietor / LLC etc.)
– Employer Identification Number (EIN)*
– Business address
– Your name and date of birth
– Social Security Number (or other valid national ID)
– Business category and subcategory**
– Customer billing statement details.
* You only need to add an EIN if your business has employees. If you’re a sole proprietor, you won’t need this.
** The closest category/subcategory match I found for therapists is Professional Services – Health & Wellness Coaching.
34. Access Two-Step Authentication Settings
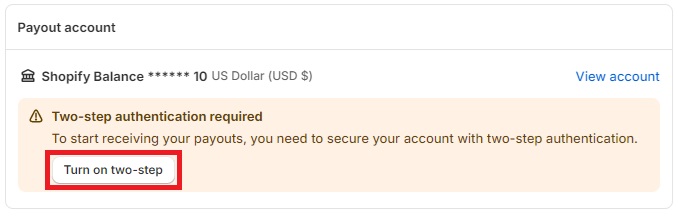
Once you’ve submitted your information, you’ll be directed back to the Payments dashboard.
Here, your next step is to turn on two-step authentication to secure your account. If you don’t do this, you may have problems accepting and processing payments.
To begin, click the Turn on two-step button.
35. Activate Two-Step Authentication
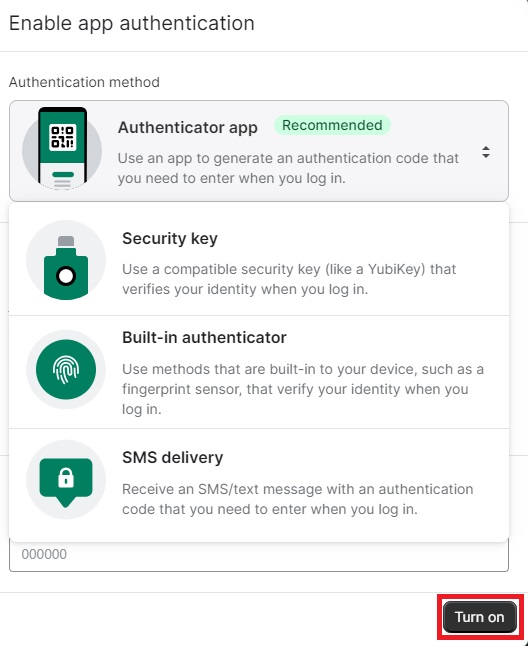
You’ll be presented with several two-factor authentication methods, including:
– Using an authenticator app or built-in authenticator tools on your smartphone
– Using a security key
– Using SMS authentication.
Pick the option that best works for you and follow the on-screen instructions to set up the authentication method.
36. Access Your Shopify Payment Settings
Completing the previous three steps will activate Shopify Payments so that you can accept payment for your courses via a range of credit card and digital wallet providers.
In the next step, you’re going to configure the Shopify Payments settings so that your earnings are deposited in your bank account.
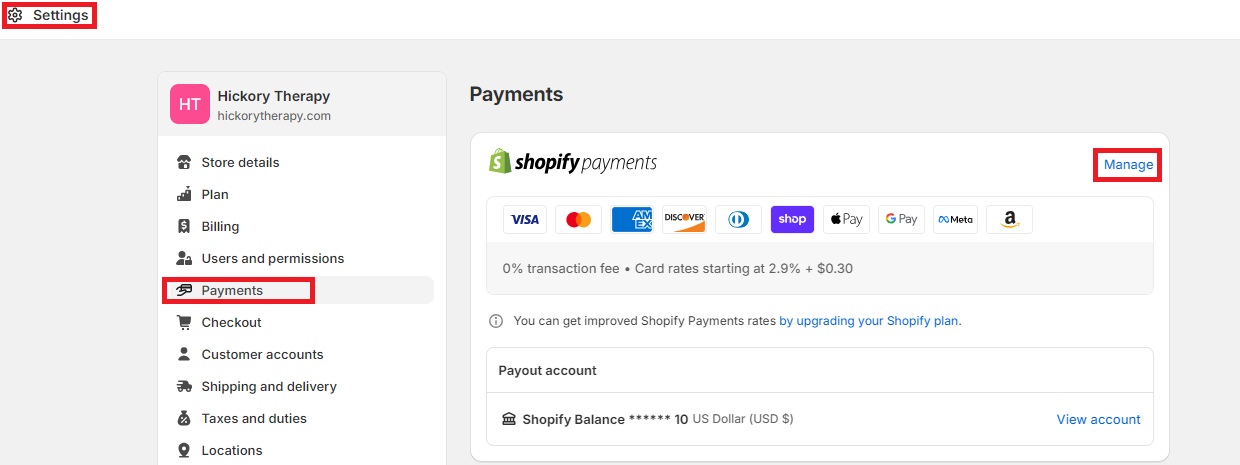
To begin this process go to Settings – Payments and click Manage next to the Shopify Payments logo.
37. Access the Payout Account Settings
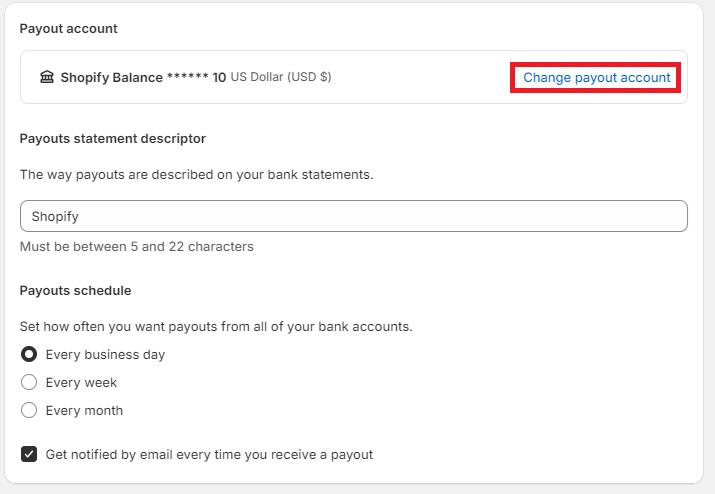
On the Shopify Payments page, scroll down to the Payout Account section and click Change Payout Account.
38. Connect Your Bank Account
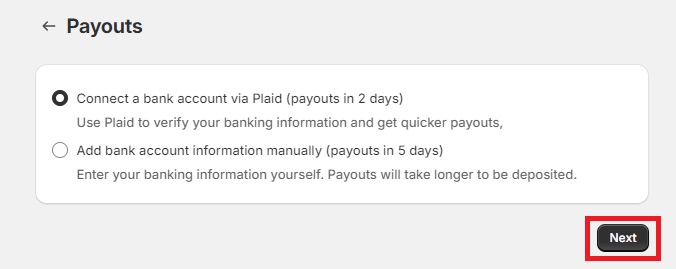
On the next screen, select one of the two available options and click Next, then follow the on-screen instructions to connect your bank account to Shopify.
39. Connect a Domain Name to Your Store
By now, you’re almost ready to launch your online course website. There are just a few important final details to take care of.
The first is connecting a domain name to your store so that it’s easy to find.
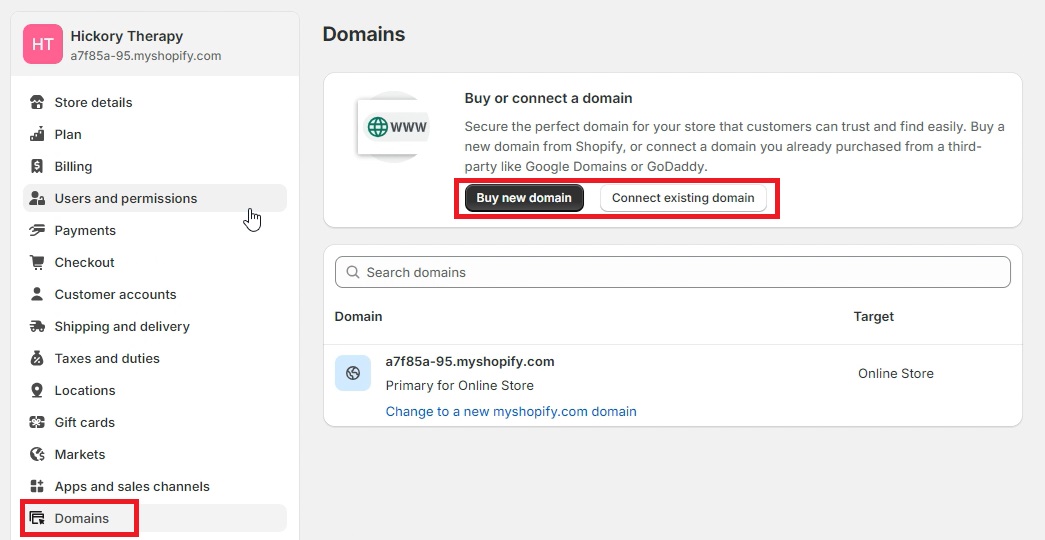
To do that, go to Settings – Domains, choose either Buy a new domain or Connect existing domain, and follow the on-screen instructions.
If you’re not sure which option to choose, see my complete guide to domain names for therapists for some handy pointers.
40. Place a Test Order
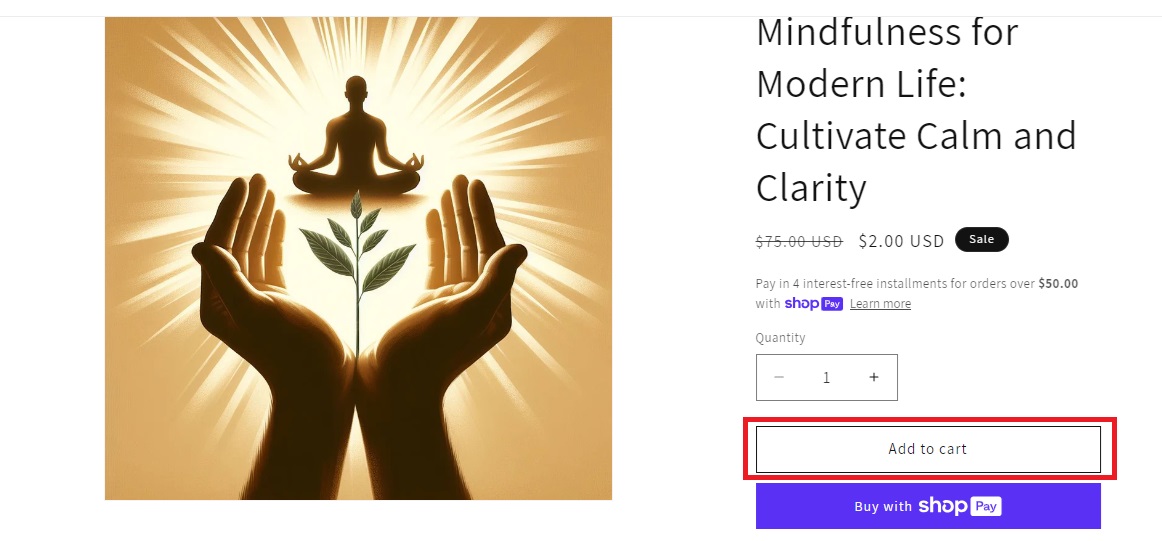
Prior to launching your new store, it pays to place a test order to ensure that everything works as it should.
Before you do this, I recommend changing the price of one of your products to a small amount (Shopify accepts anything over $1) to minimize the impact on your bank balance.
Then, log in to the password-protected version of your site (you can get your password from Online Store – Manage Password).
Next, put yourself in the mind of one of your customers. Navigate to your product page and purchase the course, then test that the course works as it should.
41. Remove Password Protection
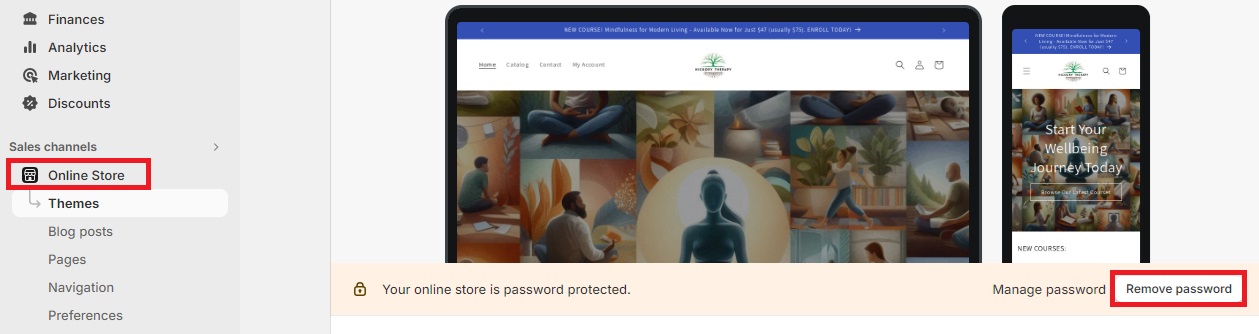
Finally, head to Sales Channels – Online Store and tap Remove password. This will make your live website accessible to your customers.
You can now start promoting your store and give yourself a pat on the back for a job well done.
Enjoyed this post? Get more marketing advice for therapists every week by following Therapist Marketing Tips on Facebook.