This guide to creating Pinterest board covers is designed specifically for beginners, showing you the exact steps you can take to make a custom board cover and add it to your Pinterest board.
To complete this tutorial, all you’ll need is a free Canva account, 30 minutes of your valuable time, and, of course, your Pinterest boards themselves.
Along with the step-by-step instructions, I’ll also discuss whether you should even bother adding board covers to Pinterest in the first place and suggest some best practices for optimizing your boards to the fullest.
Do You Need Pinterest Cover Boards?
There are plenty of marketers who argue that adding covers to your Pinterest boards is a waste of time, mainly because very few people will ever actually see them.
When people land on your Pinterest profile, they’ll see all of your individual pins rather than the boards they belong to. A user has to manually click on the Saved tab to view your boards.
What’s more, adding covers can seem like a laborious process. As you’ll see in the tutorial below, you have to first create your cover and then add it as a standard pin before you can use it.
So why bother?
Why go to all that trouble for something that will hardly be seen?
Here are a couple of reasons:
1. It Looks Better

The image above is a screenshot of my Therapist Marketing Tips Pinterest profile without board covers.
By default, these boards show the latest pins added to them.
Don’t get me wrong, it isn’t terrible, but since Pinterest pins are a different size and shape than boards, some of those pins are awkwardly cropped, and the whole thing looks untidy.
Now, take a look at the image below, which shows the same profile after I added covers to my boards.
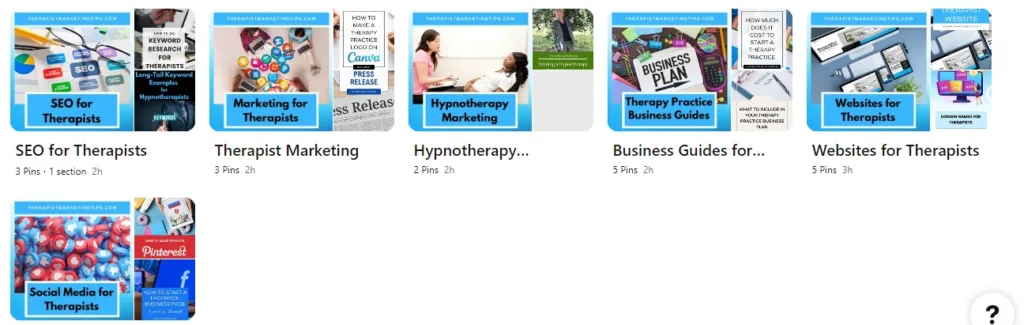
Doesn’t it just look better?
Everything is neater and tidier, and it’s immediately obvious what each board is about.
Sure, these covers aren’t going to make a significant difference to my marketing efforts, but it does help me create a more professional look for my brand, something which, as a therapist and marketer, is exactly what I want.
2. Boost Brand Awareness
One of the biggest benefits of board covers is that they help you to maintain consistent branding across Pinterest.
By consistently using your brand’s colors, fonts, and styling choices on your board covers, you create a cohesive and recognizable visual identity that extends across your Pinterest presence.
When people encounter your covers, they instantly associate them with your brand, reinforcing their existing knowledge and understanding.
This repetition and reinforcement play a vital role in building brand recognition, allowing you to leave a lasting impression on your audience and increasing the likelihood of engagement, loyalty, and, ultimately, more paying clients.
3. It Takes Less Time Than You Think
Some people argue that creating new covers for each new Pinterest board is a time-consuming process.
Anyone who tells you that is a bloody liar.
Yes, it might take you anywhere up to 25 minutes to create a Pinterest board cover template, and yes, the process of adding those covers isn’t as straightforward as it could be, but look:
Once you’ve created your template, changing it for your new board and adding it to Pinterest should take no more than 2 – 3 minutes, and that’s if you’re being incredibly slow.
With that said, let me first show you how to create and upload your initial Pinterest board cover template, then I’ll tell you how you can use that template to add extra covers in no time at all.
How to Create Pinterest Board Covers – Step-by-Step Tutorial
Here are the exact steps you need to take to create Pinterest board covers and add them to your Pinterest account.
Total Time: 30 minutes
1. Select Custom Size
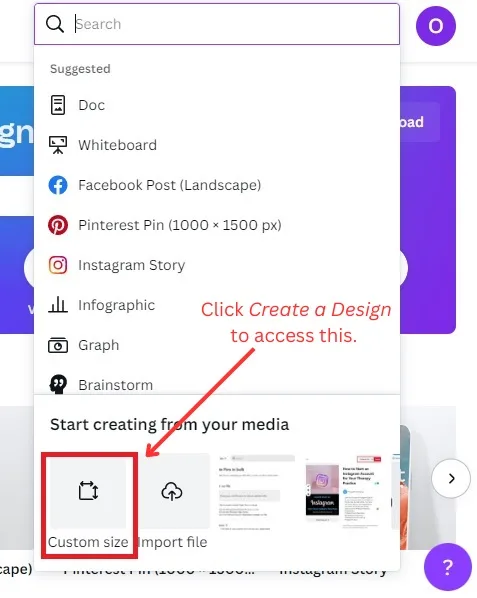
Log into Canva and click the purple Create a Design button, followed by Custom Size.
The reason we’re doing it this way rather than searching for Pinterest board covers on the Canva homepage is that doing so turns up a random hodge-podge of templates, very few of which are actually suitable for board covers.
2. Create a Custom 800 x 800 px Design
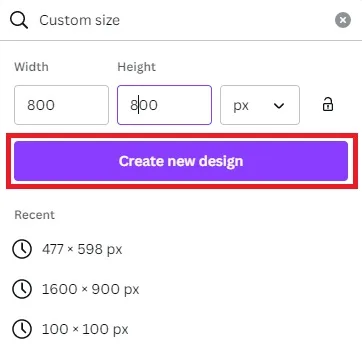
The official recommended size of Pinterest cover boards is 600 pixels by 600 pixels (px).
However, we’re going to create a larger 800 px x 800 pix image to ensure the image is of sufficient quality when displayed on Pinterest.
As long as you keep an aspect ratio of 1:1 (meaning the width and height are the same number of pixels), you may want to create an even larger image of say, 1,000 px x 1,000 px.
To create your design, enter 800 (or whatever size you prefer) into the height and width fields, then tap Create New Design.
3. Choose a Template
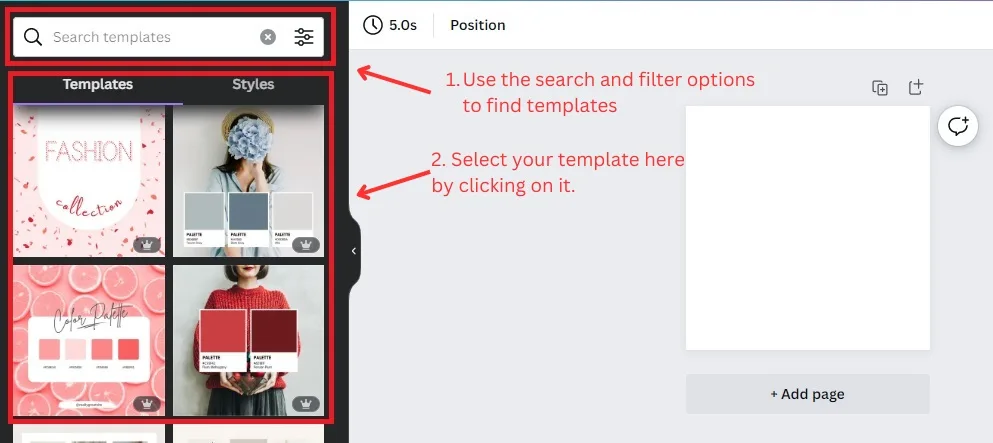
Creating a new design brings you to the Canva editor, where you’ll find a panel on the left-hand side showing various templates.
Your next task is simply to pick one.
If you don’t see anything you like right away, use the search and filter options at the top of this panel to find options that are more to your liking.
When you’ve got a template you like, simply tap it to add it to your design.
4. Edit Your Element Colors
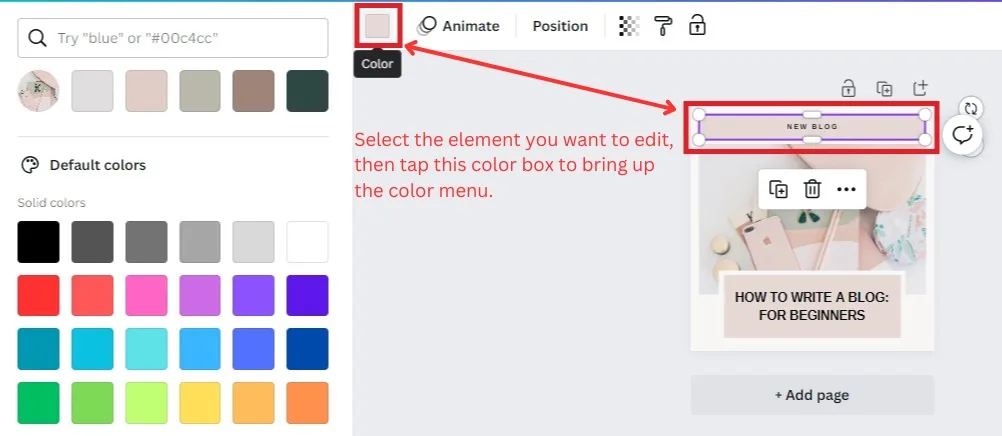
Elements are the individual components (such as shapes, text, images, and graphics) that make up your design.
Your next task is to edit them to match the colors used by your brand.
For example, since we’re making this cover board for Therapist Marketing Tips, I’m going to use the same blue, black, and white color palettes that I use here on this website and across my social media.
This helps to boost brand recognition and maintain a consistent presence across the web.
If your website, logo, and other marketing materials typically feature a red, white, and blue color palette, those are the colors to use in your cover board design.
The good news is that editing these colors is very easy.
Select the element you want to edit by tapping on it. You’ll know you’ve done this properly when the element is highlighted by a purple box with white image resizing handles in the corner and centers.
This brings up a small box on the left side of the editing menu. The box will be the same color as your element.
All you have to do is click this box to bring up the color menu and select a color by tapping on it.
You’ll then see your element change to your selected color.
5. Edit Your Text Colors
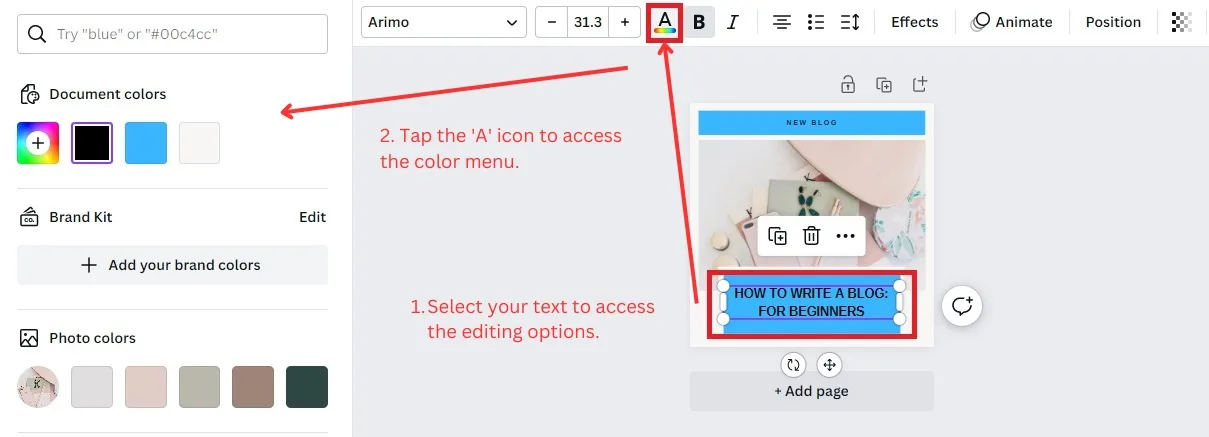
The process of editing your text colors on Canva is almost the same as changing your element colors.
This time, however, once you’ve selected the text you want to edit, you need to click the small A icon in the editing menu to bring up the color menu.
Once again, tap the color you want, and your design will be updated in real-time.
6. Customize Your Text
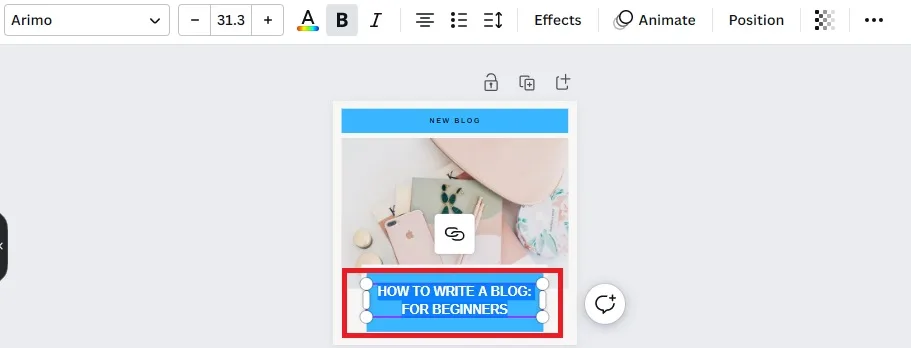
Since we’ve already got some text selected, let’s go ahead and change it to what you want your Pinterest board to say.
If you’ve ever written anything on a computer or smart device, you already know how to do this. The process is exactly the same as editing text in an email, document, or social media post.
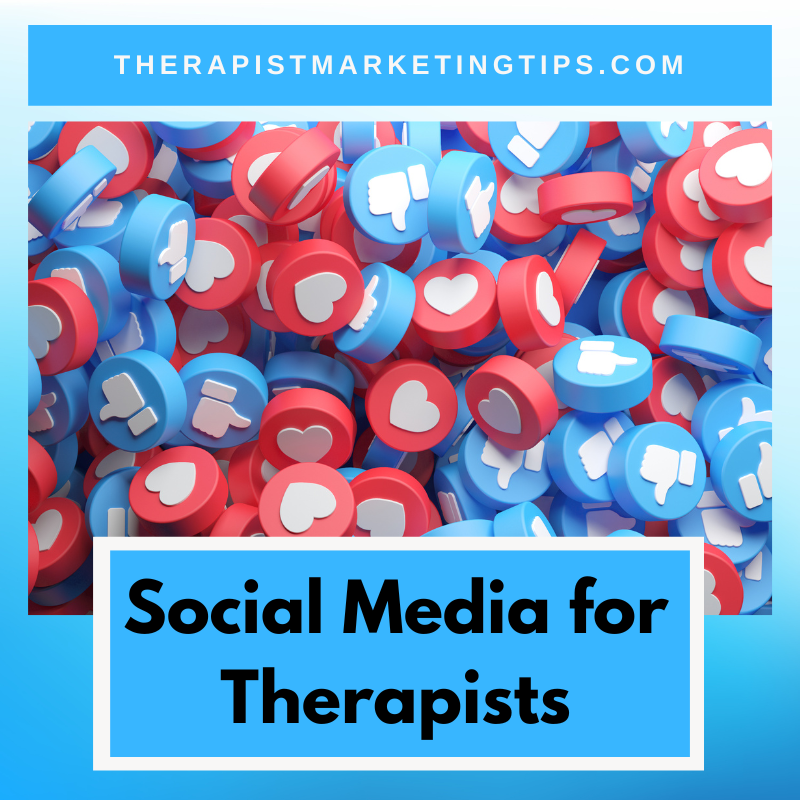
Simply double-click the text to highlight it, and then type in the name of your Pinterest board. For this tutorial, I’m using ‘Social Media for Therapists.’
Up at the top, you can use the editing menu to customize your text even further by editing all of the following:
– Font
– Size
– Styling (bold, italic, underline)
– Alignment (left, center, right)
– Spacing
– Text effects
– Position.
7. Customize Your Images
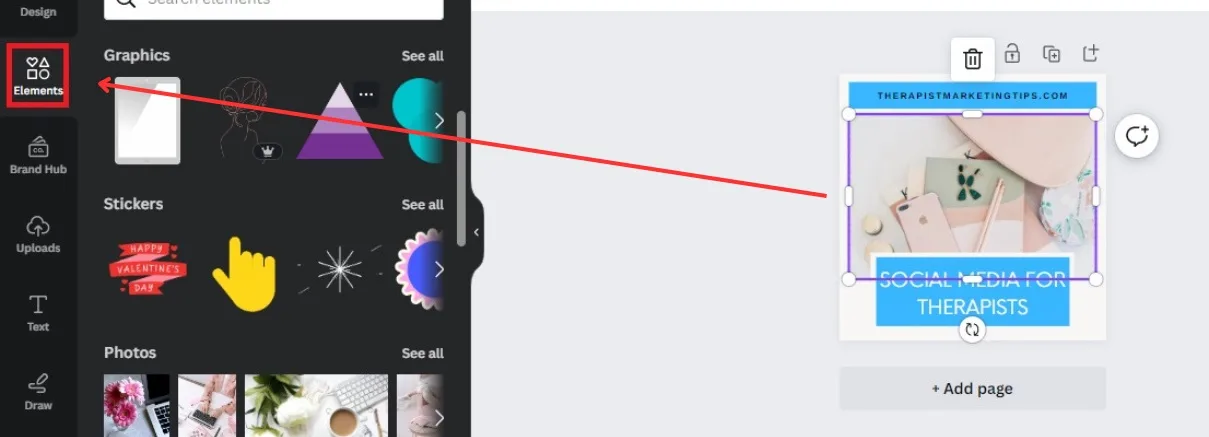
With your design almost complete, one of the last remaining steps is to change the imagery so that it reflects the subject of your Pinterest board.
Select the image you want to edit, then open up the ‘Elements’ tab at the left of the Canva editor.
Here, you can choose from an assortment of photos, graphic icons, and a host of other design features.
For my design, I’m going to select Photos and then use the search feature to find something related to social media.
If you already have your own images that you want to use, you can add them to Canva using the Upload function.
8. Add Finishing Touches to Your Design
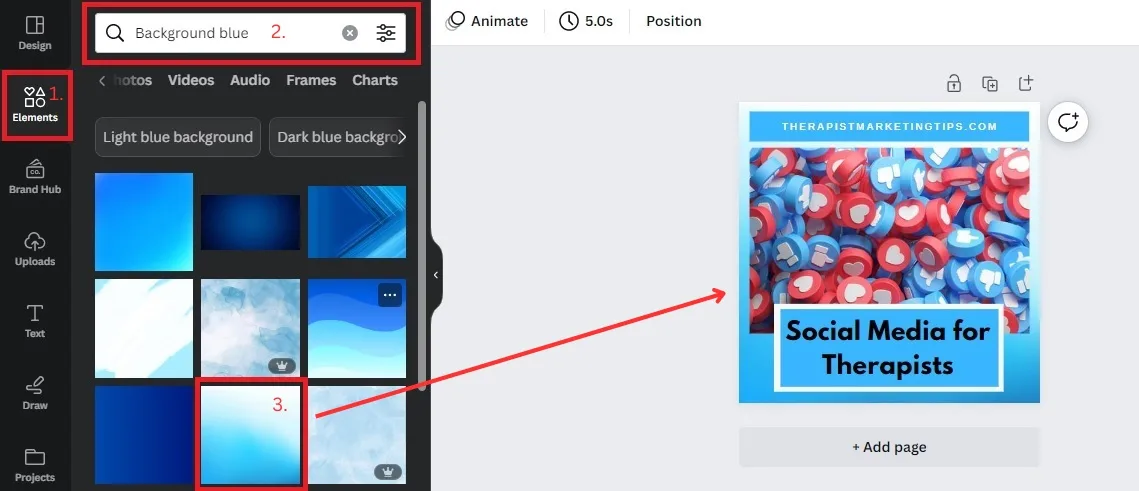
Now that you’ve mastered the basics of adding and customizing different Canva elements, you can use these skills to fine-tune your design and get it looking exactly how you want it.
In this example, you can see that I’ve used the elements tab to find an attractive background which I then simply dragged into place. I also changed the font of my board name to match the Therapist Marketing Tips logo using the process I showed you in Step 6.
9. Download Your Design
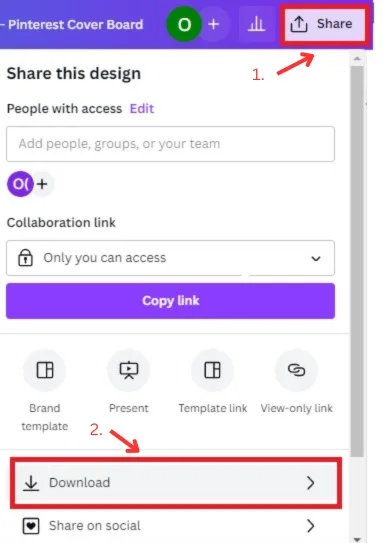
When you’re happy with your design, tap the Share button followed by Download. Keep the file format as PNG and save the file to your device.
10. Open Your Pinterest Profile
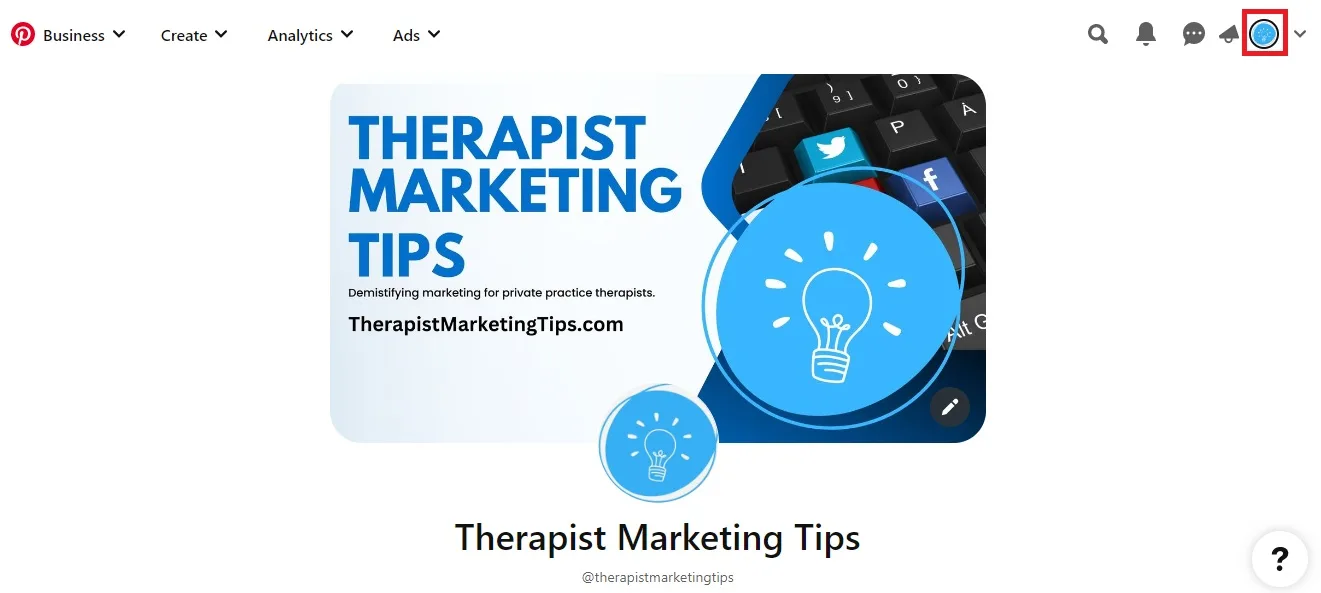
Assuming you’re logged into Pinterest, tap the profile picture icon in the top-right corner to access your profile.
11. Upload Your Board Cover as a Pin
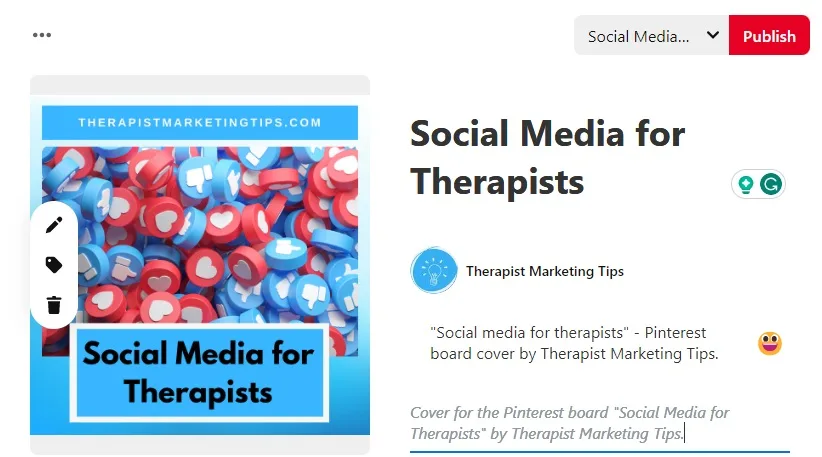
Pinterest only allows you to use existing pins for your board cover, so your next task is to upload your design as a pin and save it to the relevant board.
If you’re not sure how to do that, see How to Create Pinterest Pins for detailed instructions.
12. Access Your Pinterest Boards
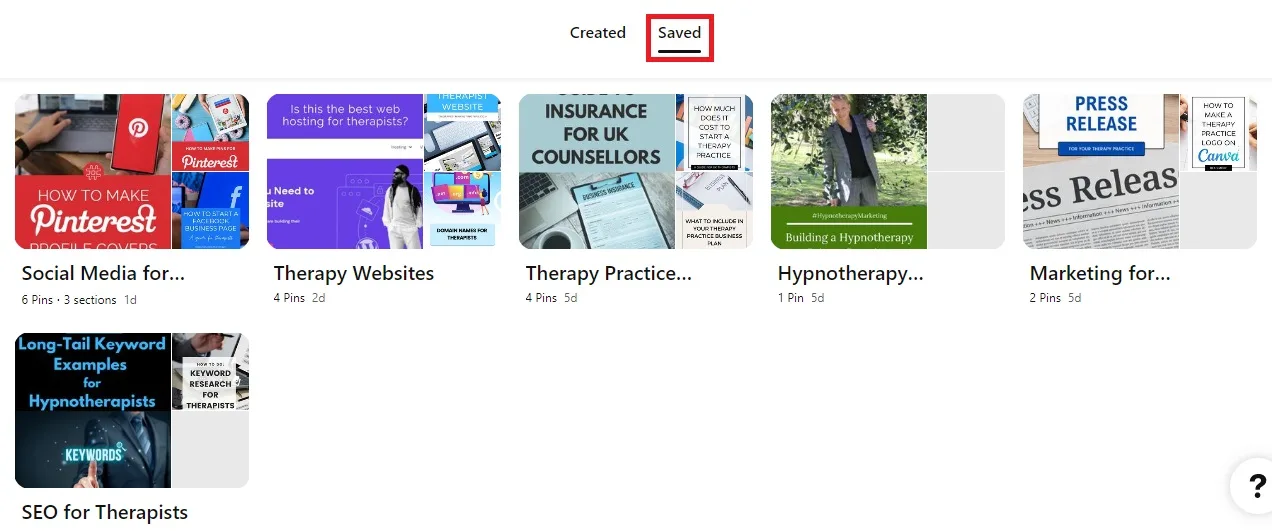
By default, your Pinterest profile is set to Created. As you’ve probably deduced, all the pins you created and uploaded are saved here.
To access your Pinterest boards, simply switch to Saved.
13. Click the Edit Icon on Your Board
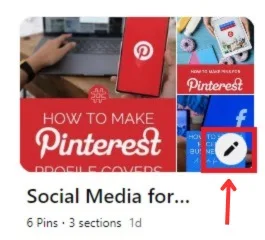
Find the board you’ve just made a cover for and hover over it until the edit icon appears. If you’re not sure what this looks like, it’s basically a white circle with a black pencil in the middle.
14. Tap the Square to Select a Board Cover
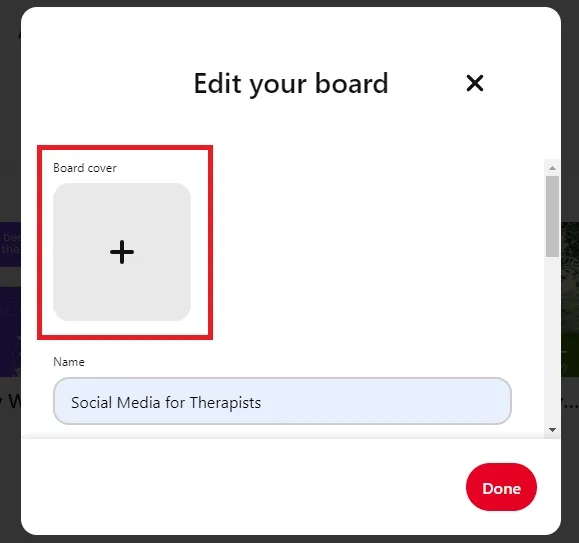
Clicking the edit icon presents you with a full range of options for optimizing your Pinterest boards, including the ability to select their covers.
To do that, click the big grey box with the black + sign.
15. Click on Your Board Cover
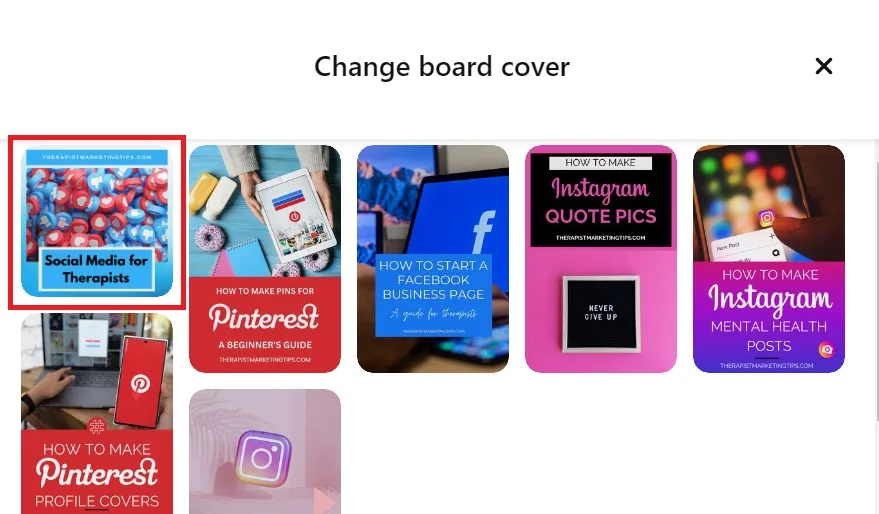
Now, you’ll see all the pins saved under your board.
If the Pinterest board cover you just uploaded isn’t available, exit the board, go back to your profile, refresh the page, and try again.
I know it’s frustrating, but I find this works whenever uploaded pins don’t show on my boards.
16. Skip ‘Move and Scale to Crop’
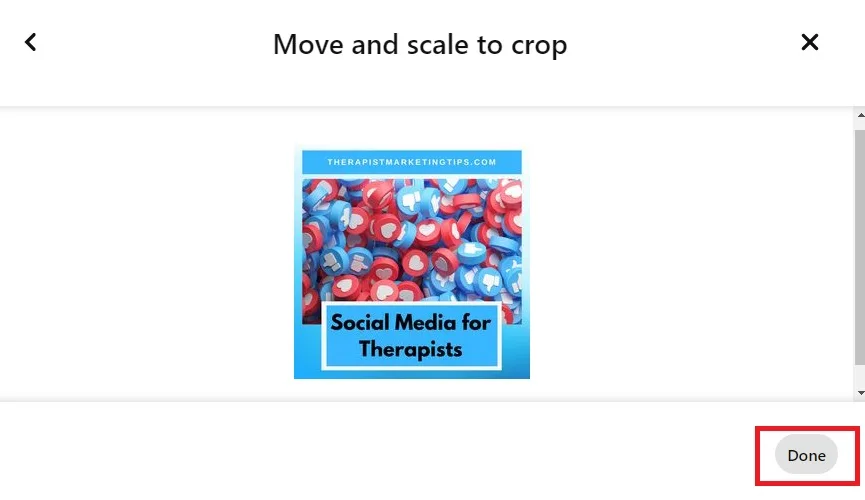
You’ll next be given a screen that gives you options for repositioning and resizing your design.
However, since you’ve already taken the trouble to ensure it meets the correct size for Pinterest board covers, you can skip this step.
Instead, click Done and move on
17. Finish Optimizing Your Pinterest Board
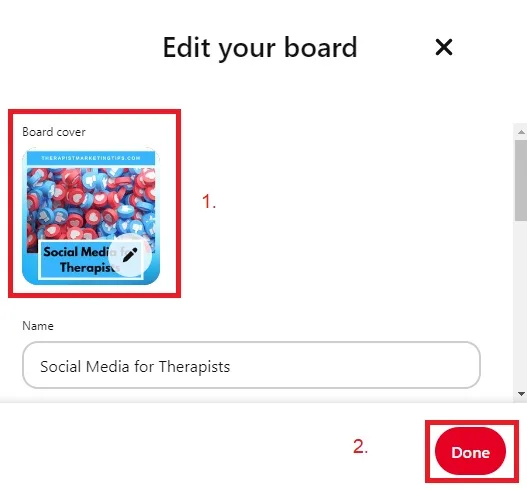
If you’ve done everything right, you’ll now see that your design is set as the board cover.
Take this time to make sure that your board description is properly filled in, then tap Done
With that, you really are done. You’ve successfully learned how to create Pinterest board covers for your account, and if you’ve followed these steps to the letter, it should look something like this:
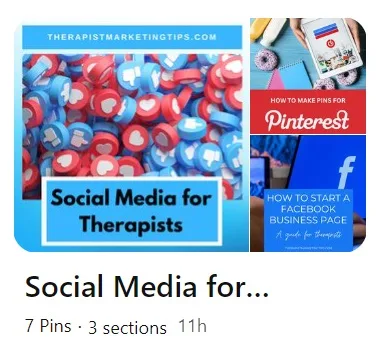
From now on, that board cover will remain permanently in place on one side so that users can quickly identify what your board is about, while the other neatly showcases your two latest pins, giving users a sneak peek of what’s in store.
How to Create Extra Covers
The good news is that you’ve now done the hard work.
That design you created for your first board cover can be edited and reused over and over again across all your boards.
After I created the design showcased in this guide, I used the exact same design to create covers for all of my boards.
All I had to do was open up my board cover design, change the main text to reflect the subject of my board, add a relevant image, and then download it from Canva and add it to Pinterest.
It took me just shy of 9 minutes to create five additional images and add them all to my boards, and there’s no reason you couldn’t do the same.
How to Create Pinterest Board Covers: Recap and Next Steps
If you’ve followed the 17 steps above, you now know all there is to know about how to create Pinterest board covers.
Just to ensure you didn’t miss anything, here’s a recap of the main lessons from this tutorial:
- Board covers aren’t necessary for Pinterest – But they can be helpful for creating a more professional look for your business.
- Create a custom image of at least 800 px x 800 px – Pinterest board cover images are officially 600 px x 600 px, but make one a little bigger to create your design.
- Maintain consistent branding – If you use red, white, and blue on your website, logo, and stationary, use those same colors on your board covers to bolster brand recognition.
- Your board cover template can be reused to save time – Don’t create a new cover from scratch every time you make a new board. That’s a big waste of time. Instead, use your design as a template that can be quickly edited for each board.
So what now?
First, I recommend taking advantage of the 30-day free trial of Canva Pro.
Although everything I’ve shown you in this guide can be done with the free version of Canva, the Pro version gives you more high-quality templates and graphics that you can use to really make your board covers stand out from the crowd.
When you’ve done that, check out my definitive guide to Pinterest for therapists to learn more about:
- Why Pinterest is the ideal platform to promote your private practice
- How to create a fully-optimized business profile
- Top tips and strategies for creating Pinterest content that connects with your audience.
Enjoyed this post? Get more marketing advice for therapists every week by following Therapist Marketing Tips on Facebook.