In this quick and simple tutorial, I’ll show you how to create a Pinterest cover photo on Canva for free and add it to your Pinterest Business profile.
By doing so, you’ll be able to make a big first impression when visitors land on your Pinterest profile, capturing the attention of your audience in a way that proves invaluable for building a Pinterest following and boosting brand visibility.
If you haven’t already done so, you’ll need to sign up for a Canva account before you can follow the 13 beginner-friendly steps below.
All done?
Great, then let’s get started!
How to Create a Pinterest Cover Photo on Canva: Step-by-Step Tutorial

Canva doesn’t have any specific templates for creating Pinterest profile photos. The following steps will show you how to make one any way using a custom-sized image.
Total Time: 20 minutes
1. Create a Custom Size Image
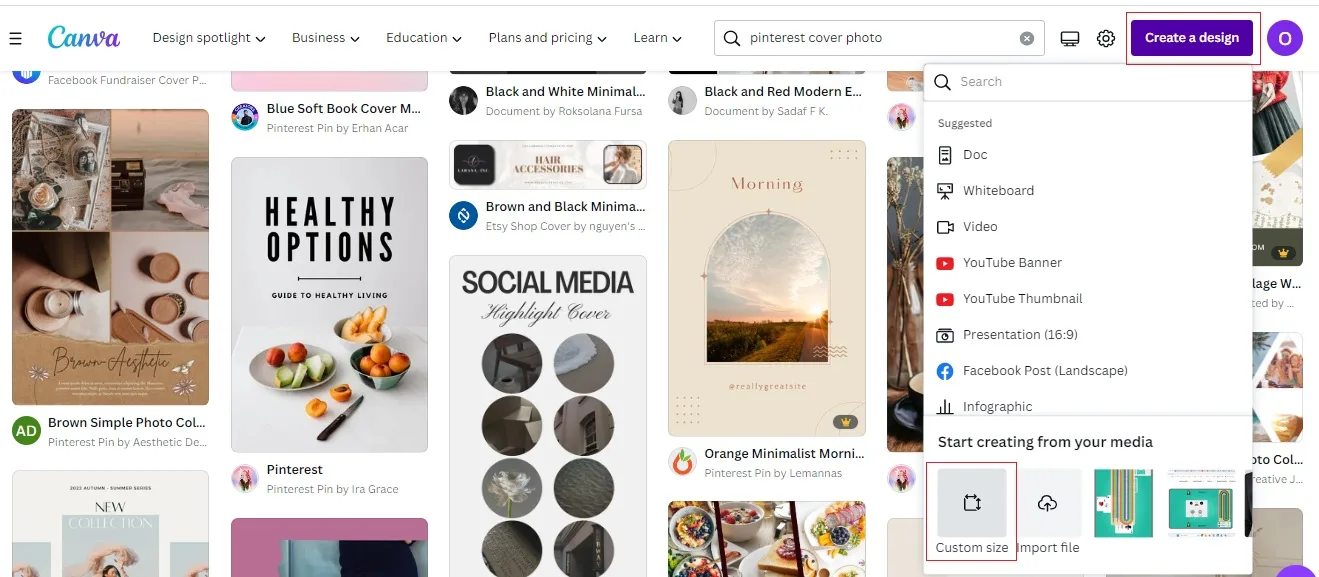
First, log into Canva and click Create a Design, followed by Custom Size.
2. Set Your Image Dimensions to 1600 x 900 px
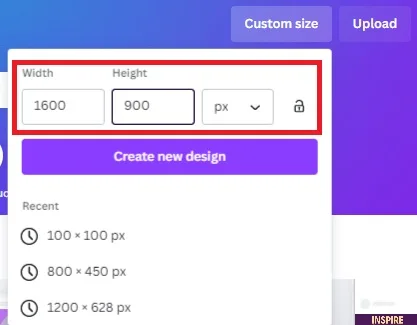
Pinterest’s official cover photo guidelines require that you use an image with a 16:9 ratio. The minimum dimensions are 800 x 450 pixels (px), but today, you’re going to create a much larger one at 1600 x 900 pixels.
This keeps your image in the 16:9 ratio but allows you to create a much higher-quality image.
3. Choose a Template
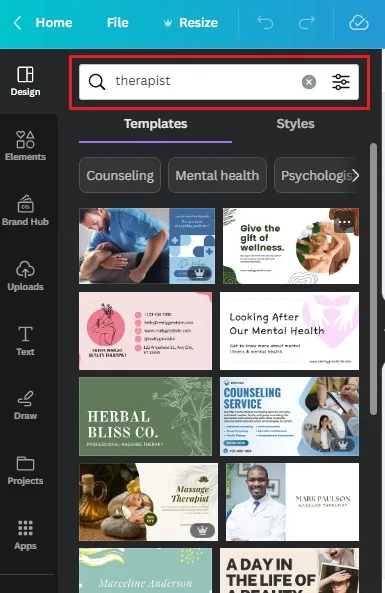
One of the many things I love about Canva is that no matter what dimensions you use for your custom image, it will always provide you with template options that best fit its shape.
OK, so the templates it does provide aren’t always 100% fit for purpose.
For example, when you and I create our 800 x 450 px image, the graphic design tool gives us presentation templates.
It’s not perfect, but don’t worry; that’s what the search bar is for.
Just type in a word related to your business, and you’ll get a selection of template options that should be much better suited to your needs.
4. Filter Template Choices According to Brand Colors

You can narrow down your choices by tapping the slider icon at the right of the search bar and selecting the colors that match your business’ branding.
Doing so means you’ll only see templates in those colors, making it easier to find one that works for you.
When you’ve found your favorite template, tap it to add it to your design
5. Edit Your Template
If you read my guide to making a logo on Canva or you’ve been using my Canva Instagram post tutorial, you should be more than familiar with the software’s range of beginner-friendly graphic design tools and how to use them.
If this is you’re not that familiar with it, let me show you a few things in the next couple of steps:
6. Customize Your Colors
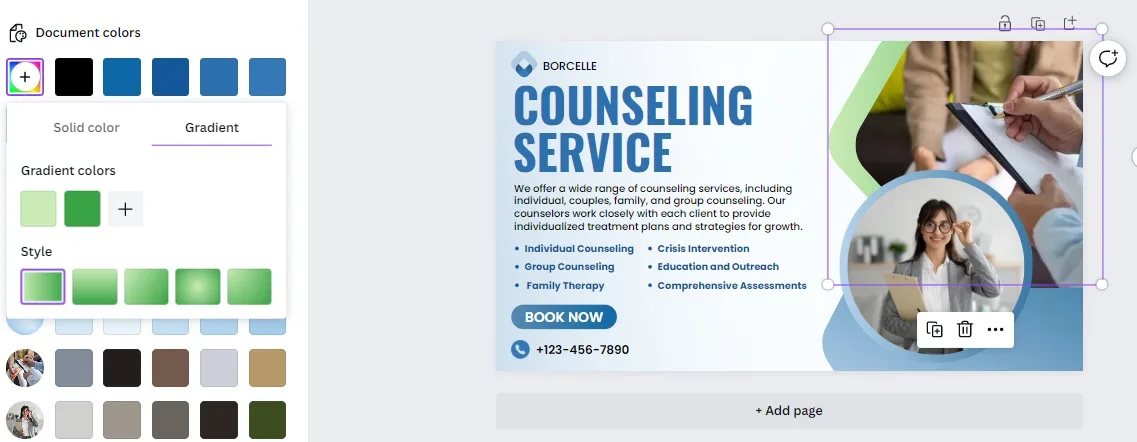
If you didn’t already find a template in the same colors as your branding, you could always change them.
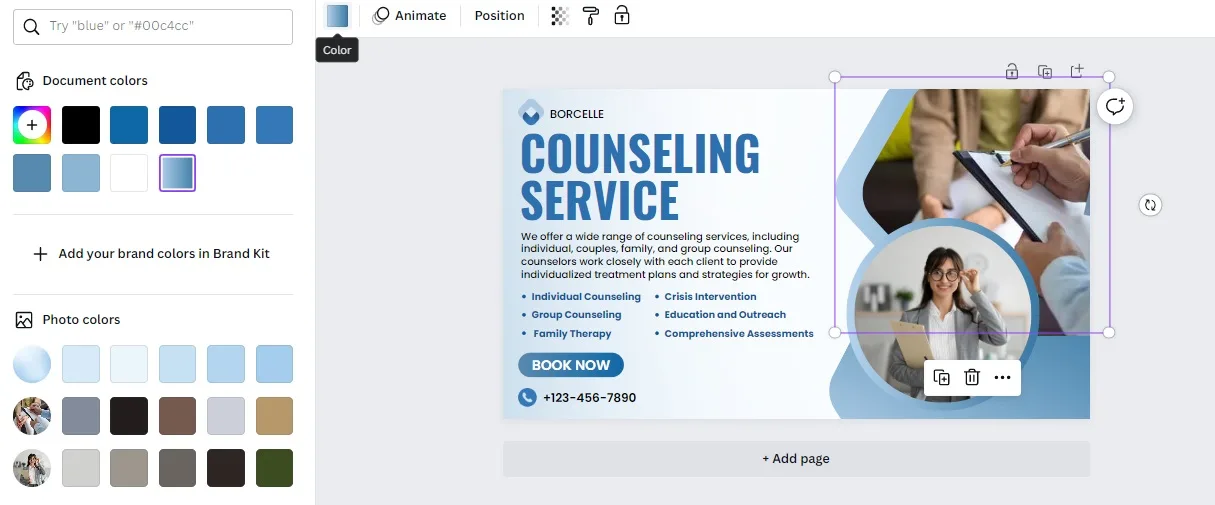
First, tap the element you want to edit.
A small square will appear on the left of the editing menu, which matches the colors of your selected element.
Click that box, and a color options menu will pop up that you can use to get the colors just right.
7. Replace the Text With Your Own
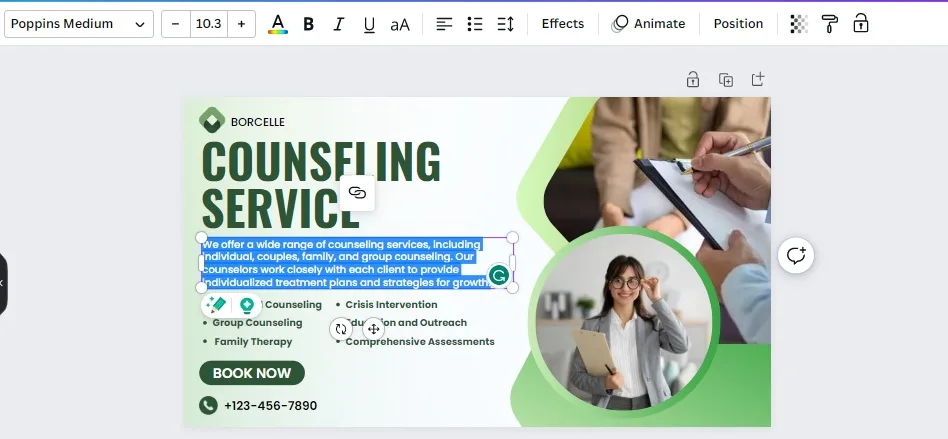
Clicking on any text area will allow you to replace the template copy with your own words.
Meanwhile, the editing menu gives you everything you need to change all of the following:
– Font
– Text size
– Color
– Styling (bold, italic, underline)
– Position and alignment
– Spacing.
8. Rearrange Elements
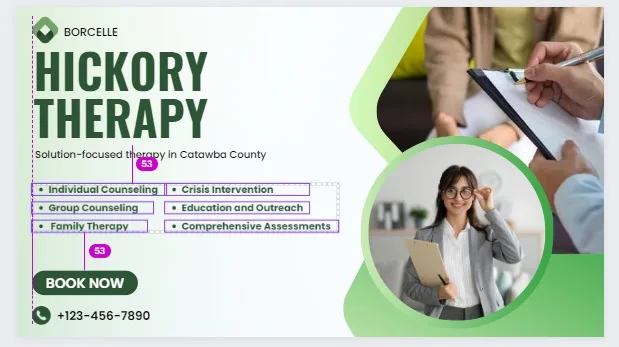
You can move any element on your screen to a different position by clicking on it, dragging it to where you want it, and dropping it into place, hence why tools like Canva are frequently referred to as “drag-and-drop.“
The one thing I really like here is that when you rearrange your elements, you get handy guidelines to help you maintain their alignment and place it into a new spot with pinpoint precision.
9. Add and Replace Images From Stock Photos
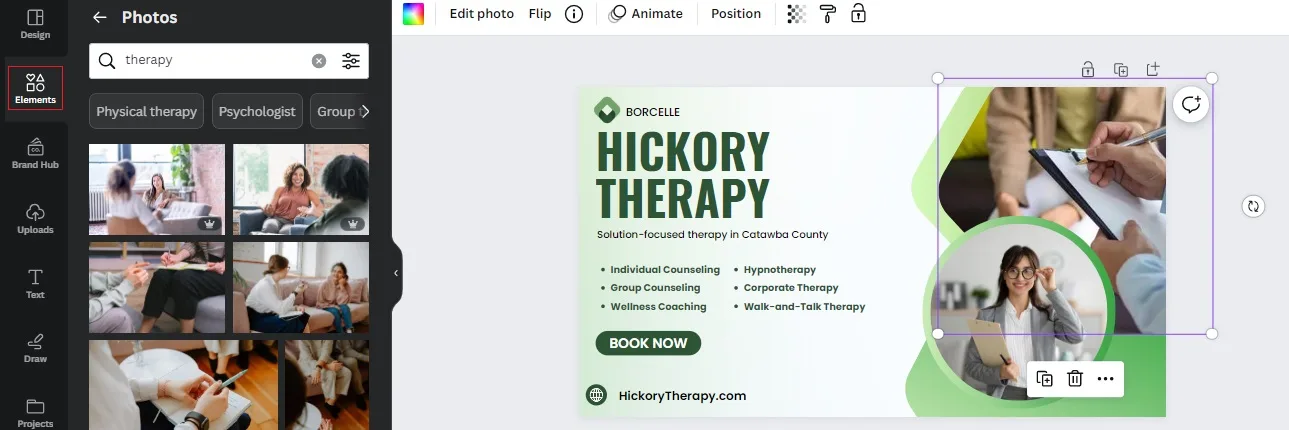
To replace the template images with ones that better reflect your business, tap on the image and then go to Elements – Photos to use the stock images.
10. Upload Images From Your Device
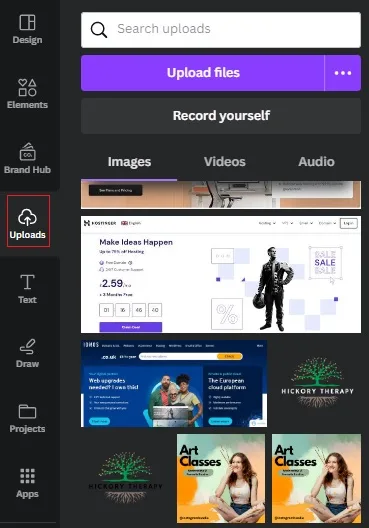
As an alternative to stock images, you can also navigate to Uploads and add your own content.
Alternatively, you can go to Uploads and upload your images.
Whichever option you choose, just click it and drag it into the element you highlighted.
11. Add Any Finishing Touches

Having reached this stage, you’ve essentially finished making your Pinterest cover photo.
Now, I’m not saying that this is the most outstanding design in the world, but for someone like me who has zero graphic design training or talent, I’d say it’s a pretty good effort.
I may make a few minor tweaks here and there, and you may want to do the same just to be sure this new design of yours is exactly how you want it.
Once you’re as happy with your image as I am with mine, let’s move on and get it on Pinterest.
12. Download Your Pinterest Cover Photo From Canva
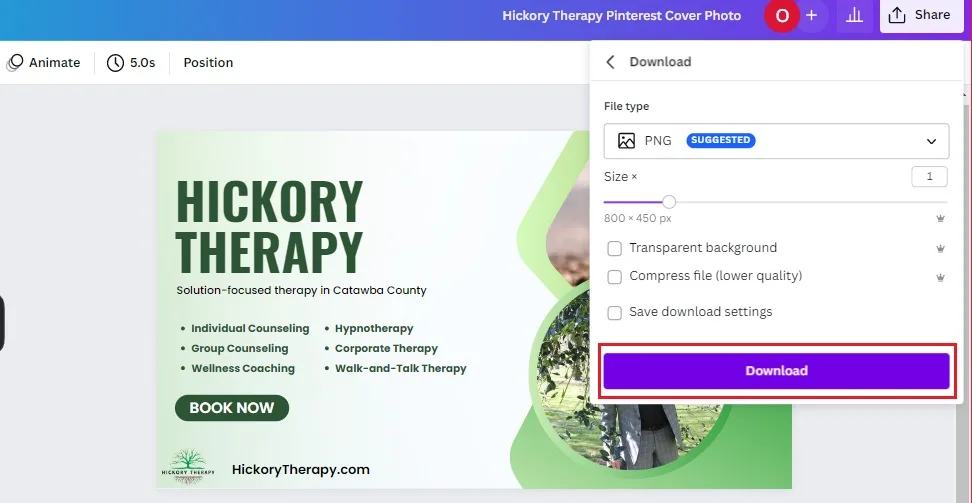
To download your design, navigate to Share – Download.
Keep the file format as PNG, as this is the best format for showcasing your image on the web, and then tap Download to save the image to your device.
13. Add Your Cover Image to Pinterest
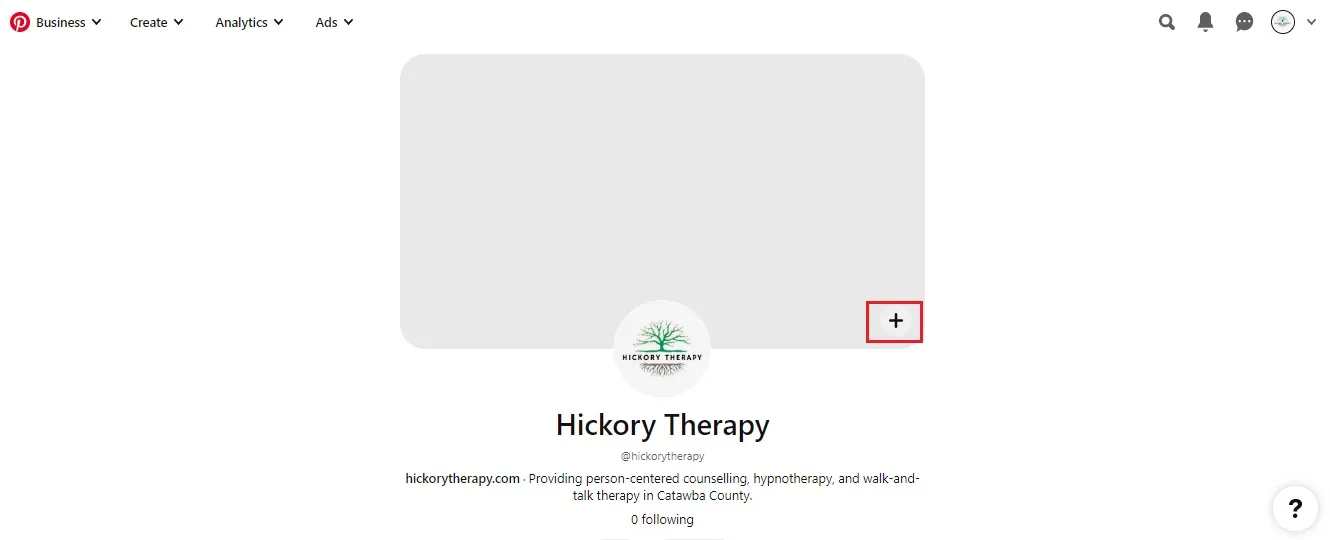
Finally, log into Pinterest and head to your profile.
If you already have a cover photo, click the pencil icon in the bottom right and select Change Cover.
If this is your first cover photo, you’ll see a big, grey box above your profile photo with a + symbol in the bottom corner.
Tap that, upload your newly-designed image, and that’s it; you’re done!
If you’ve followed these steps exactly, your Pinterest Business Profile should now look something look like this:

Pinterest Profile Cover Image FAQs:
Is a cover image necessary for a Pinterest?
No. You could choose not to use a cover image for your profile and Pinterest will simply display your profile picture instead.
What are the benefits of Pinterest cover photos?
The cover photo will be the first thing users see when they visit your Pinterest business profile, giving you an opportunity to immediately make a strong first impression.
You can use your cover image as an ad for products or services, or to highlight your business’ USP, which can help convert those passing visitors into paying customers.
Can I have a profile cover picture on my personal Pinterest account?
No. Cover pictures are only available on Pinterest business accounts.
How to Create a Pinterest Cover Photo: Recap and Next Steps
So, there you have it, everything you need to learn how to create a Pinterest cover photo for your business profile in under 20 minutes.
Although you can do this for free, I recommend at least considering the 30-day free trial of Canva Pro so that you can access more high-quality templates and graphic elements to really make your designs stand out.
Whichever version of the popular graphic design tool you prefer, you now know how to:
- Create a custom 1,600 x 900 px image – Pinterest requires a minimum profile cover picture size of 800 x 450 pixels, but creating a 1,600 x 900 px image gives you a better quality image while maintaining the right 16:9 ratio.
- Choose and edit a cover image template – Remember to match the colors your business uses for branding and add small amounts of relevant text that tell people what you do.
- Add your cover image to Pinterest – Once logged into your business account, uploading a cover image gives your Pinterest profile more visual appeal and an extra opportunity to promote your services.
So, what next?
This tutorial is part of a larger guide to Pinterest that covers:
- How Pinterest can help you attract new clients and boost your reputation as an expert in your niche.
- How to optimize your free business profile to enhance your brand visibility and drive web traffic.
- Best practices for creating Pinterest-friendly content that connects with users.
Learn all that and more in my guide to Pinterest marketing for therapists.
Enjoyed this post? Get more marketing advice for therapists every week by following Therapist Marketing Tips on Facebook.



Comments are closed.